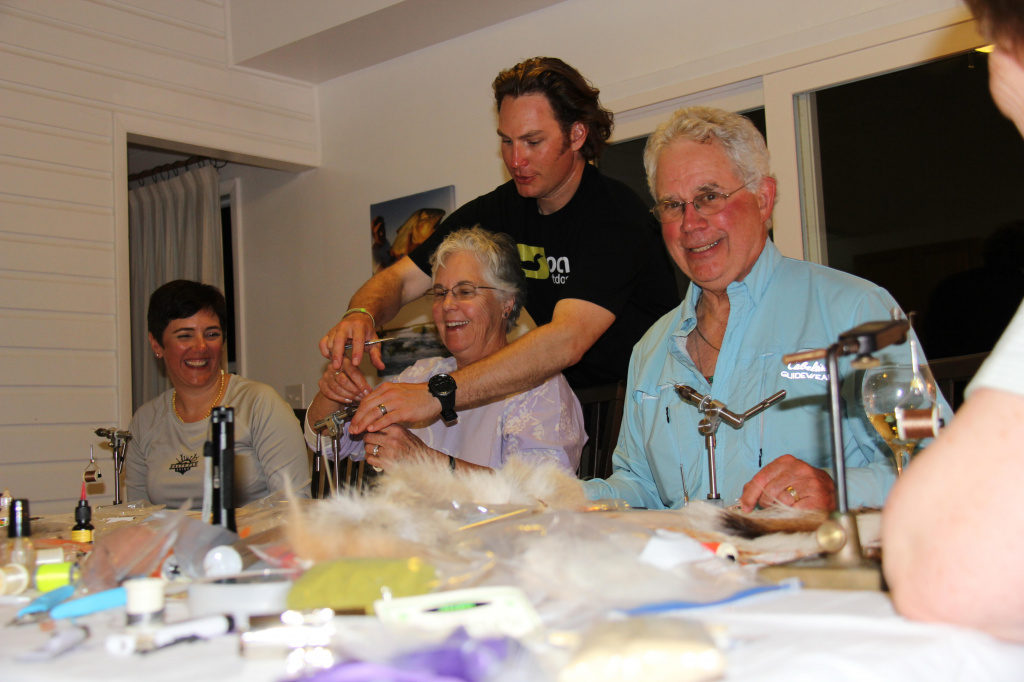
Having spent a fair amount of time behind the vise or around others tying, I believe that the reasons for tying fur and feathers onto a hook go much beyond catching fish, further than any who don’t tie could ever imagine. Whether it’s the camaraderie or the creativity, art, or simply a means to catch fish, people are passionate about tying flies for a lot of different reasons. For me, it’s all those reasons and more. Tying has become part of my daily routine, and teaching people, especially beginners how to tie flies is one of my favorite activities.
My passion is developing and tying flies, and I help fly tyers of any skill level learn how to develop and improve their own fly patterns. Not only do they learn to tie better flies, but best of all, they catch more fish too!

This article should be everything you need to know and then some for getting set up to tie saltwater flies. I will cover the basic tools you will need, touch on basic materials – a huge subject on its own – and give you some tying tips to get started.
What I’ll Cover In This Article:
- Choosing Your Tools
- Fly Tying Vises
- Fly Tying Lamps
- Choosing Scissors
- Bobbins, Bodkins / Dubbing Needles, Dubbing Brushes & Dubbing Springers
- Pliers & Other Tools
- Bench Organization
- Beginner Fly Tying Materials
- Tying Tips for Beginners
Once you’re up and running if you need more how to info check out my books and Ebooks. A frustration of mine is trying to learn a new pattern or tying technique without clear illustrations or instructions. I subscribe to all kinds of fly tying magazines and have quite a few fly tying books, and I can’t tell you how many times I wish there was one more photo, or I could have zoomed in on a picture. I think that most of us would appreciate more than five or six 1-inch photos to thoroughly explain how to get from point A to point Z. That is one of the main reasons for the ultra close-up shots and hi-res photography, one or two photos per page, and excessive number of photos used to illuminate the ideas and techniques found in all my books.
Choosing Your Tools
After three plus decades of tying, I have accumulated a dizzying array of tools… Most of which are designed for a very specific application or bluntly put “uni-taskers”. For a commercial fly tyer these are nice to have and make life easier, but totally unnecessary for the beginning tyer. For the most part you only really need a hand full of key tools to start turning out your own flies. That being said the quality of these tools is very important to your success and sanity. Let’s start with the three most critical in my opinion; The vise, tying lamp and scissors. This is where the bulk of your budget should go and skimping on any of these will inevitably lead to frustration.
Fly Tying Vise
Without a doubt the most important tool for tying any type of fly is the vise. Let me start by saying that there countless fly tying vises on the market today, each offering a wide range of options and features. Choosing a vise that fits your budget and needs is difficult, especially if you are new to the craft, or haven’t had the chance to try before you buy. That being said…When it comes to choosing a fly tying vise, you absolutely get what you pay for, so if you can stretch your budget, this is where you want to do it. Simply put, whether you are tying flies for saltwater or freshwater species, a vise that cannot hold the hook is useless no matter how much it cost.
Over the past few decades, I have acquired quite an eclectic collection of fly tying vises ranging in everything from manufacturer, shape, size and color. I have had the opportunity to tie on a wide variety of fly tying vises, and I have come to realize that you get what you pay for, and before you buy you better do your homework.
One of the most touted differentiators amongst top-notch saltwater vise manufacturers is the size range of hook that their vises jaws can grasp effectively. “Effectively” being the objective word here… In my 30+ years of experience, only a select few live up to these haughty claims. For me, a vise with a huge size range is far less important than one that can effectively handle my average hook size range. If saltwater is your game, you probably won’t be tying on anything smaller than a size 6 or 8 hook. The lion’s share of flies I tie for saltwater species fall in the 6 to 2/0 ranges, and with the exception of bonefish flies or the occasional bazaar custom order for Giant Trivially or Sharks, that range does not vary too much. Unfortunately this range seems to be right on the cusp of were most vises that “claim” to handle saltwater hooks seem to lose their grip and until recently the frequent hook shimmy or wrap unraveling hook slip seems to be inevitable. If your focus is cranking out larger saltwater flies constructed on heavy wire hooks, then you would be better served buying a piece of equipment that “Truly” can handle the larger hook spectrum.
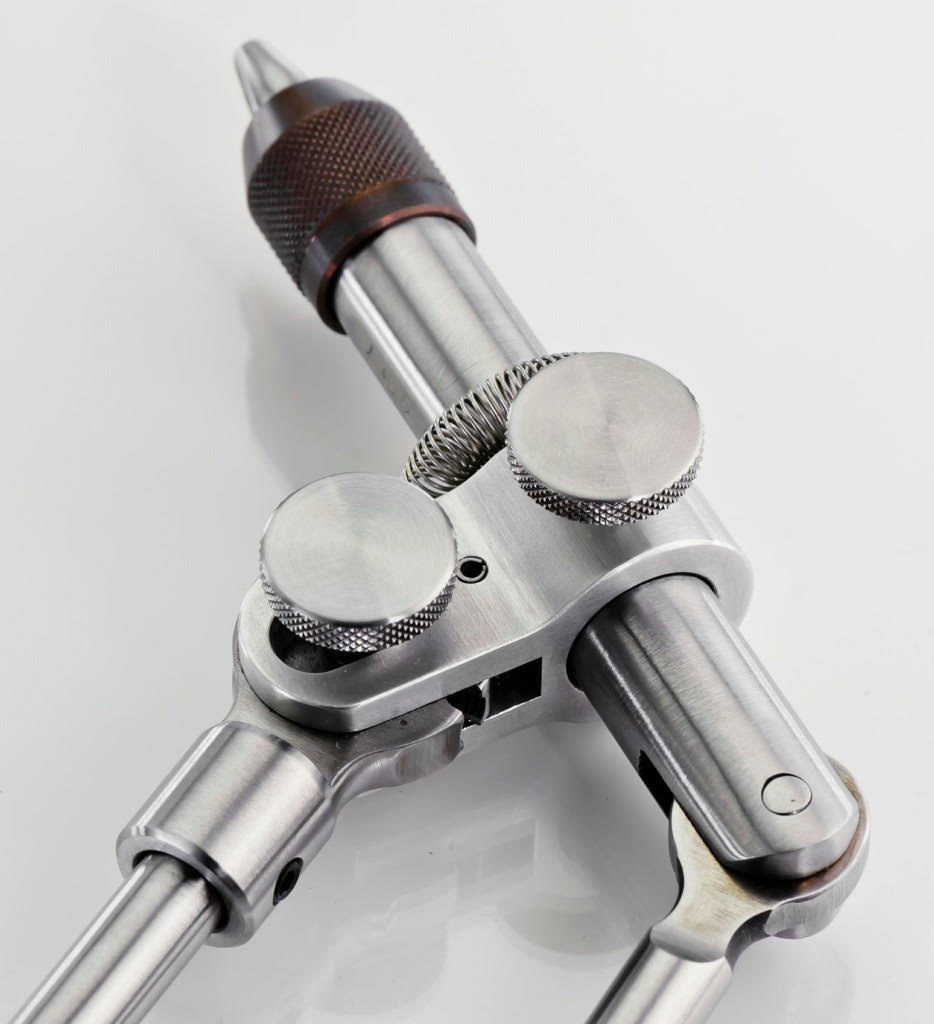
That being said, I can honestly say with out hesitation that Dyna-King makes the highest quality vise on the market today. Various sized grooves in the jaws allows all Dyna King fly tying vises to clamp down on even behemoth saltwater hooks like a junkyard dog on a ham bone. The widest groove at the back of the jaw works best for larger ought size hooks, while the next smaller groove is better suited for securing the lower end of the saltwater hook range.
Dyna-King Professional Fly Tying Vise
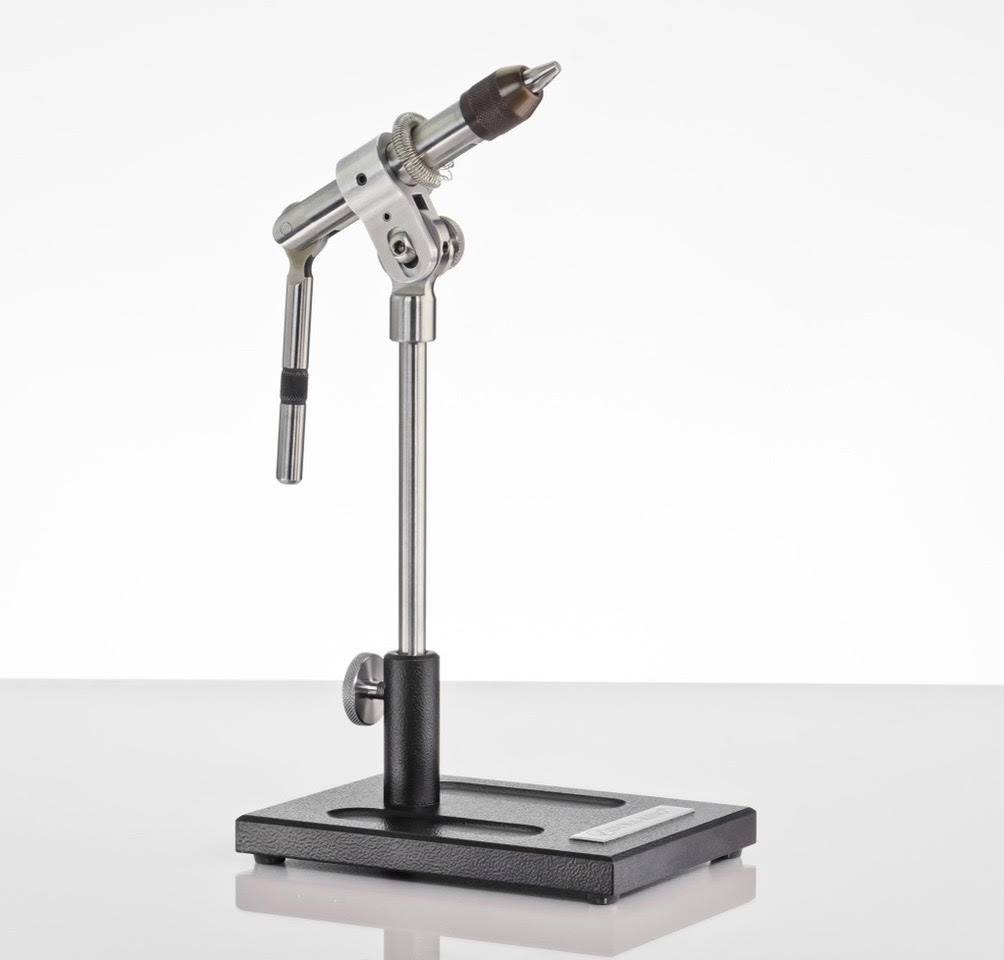
There are lots of models to choose from, but my favorite is the Dyna King Professional fly tying vise. The Pro is the vise I have tied on for years, and I can’t recommend it enough. There is nothing dainty about this fly tying machine, it is a beast! No vise I have ever tied on even comes close.
This vise features four positive locking angle adjustments for stable tying, so if you like to use a ton of thread pressure for lashing down lead eyes like I do, this is as good as it gets! When tying at home, I prefer to clamp the vise to my bench for added stability, however the pedestal base is very convenient for traveling or tying in less ideal situations. It has 360 degree rotation and is fully machined with the best stainless steel and aluminum available.
Dyna-King Kingfisher Fly Tying Vise
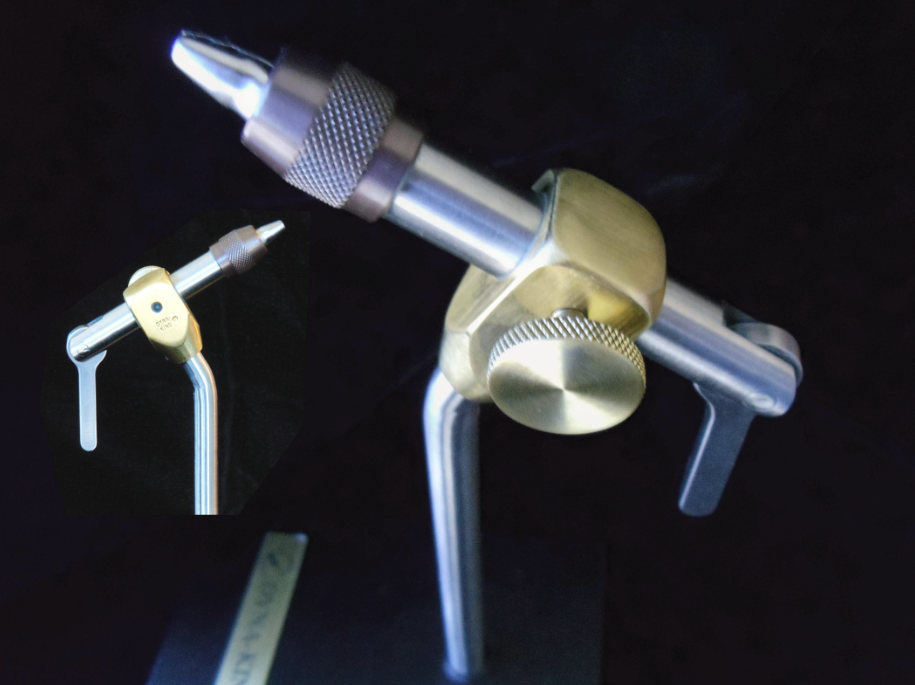
If the Professional is out of the budget and more economical option is the The Dyna-King Kingfisher. At right around $230, the King Fisher is one of the most affordable high quality vises found anywhere, and is the perfect entry level vise for budget conscious or new tyers. Small yet durable, the Dyna-King King Fisher is made of the finest materials. It has a Notch- lock cam, famous hook holding capability and 360 degree rotation. The Dyna-King King Fisher vise shares the same high quality notched jaw as the Barracuda vises.
Regal Big Game Head and Travel Base Fly Tying Vise
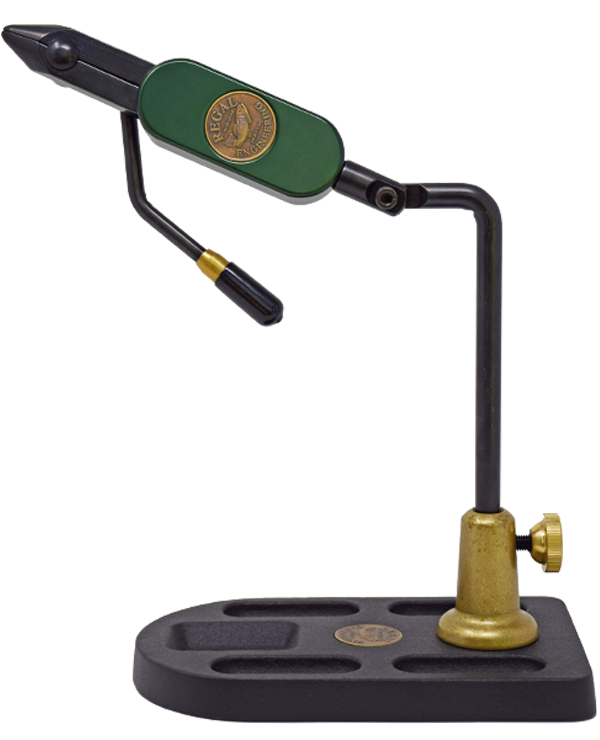
If you’re looking for something a little more affordable yet, I would suggest theRegal with the Big Game Head. This vise comes in around $250 and makes tying on a wide array of hook sizes easy.
Fly Tying Lamps
Adequate illumination is a must when it comes to tying flies. Unless your fly tying space is lit up like the surgery unit of the ER, a good desk lamp or two is an absolute must. Even though saltwater flies tend to be much larger than freshwater flies, several hours in a poorly lit space will really strain your eyes.
Pro Work Bench Lamp Light with Dual 220 Lumen (440 Total) LED Head FTL230
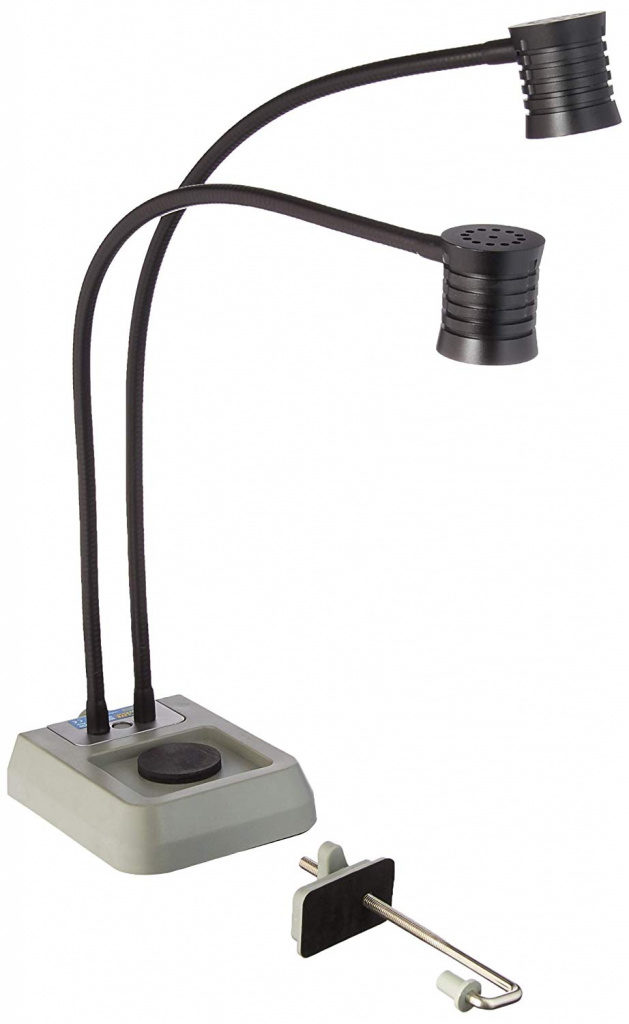
The Dual LED Pro Fly Tying Light is the best fly tying light I have ever come across. At first glance, you might think “how much light can those two little cans provide?”, but you will be pleasantly surprised, and down right amazed by the illumination emitted. The two heads are easily adjustable so you can position the light from the top and bottom of your fly if need be, which makes a huge difference with shadows. The lamp comes with a really heavy base, as well as a C-Clamp if you want to screw it down in place. The light given off is also a cool white color not a harsh orange or yellow, so It works great for photography as well. It’s a little on the “cashy” side at around $150 bucks, but I guess like anything else you get what you pay for… Far and away the best desk lamp I have ever used. I liked mine so much I ended up buying 2. I take a little flack now and again about my tying bench looking like a space ship, but two lamps makes a huge difference if your planning on spending hours in front of your vise, and it’s well worth the haranguing from your buddies.
Choosing Scissors
With all the different materials out there, you are most likely going to have a few different kinds of scissors to get the desired results. In the past I have talked about choosing scissors based on specific tying applications. But for most of the saltwater flies I tie, I use two different sized scissors to get the job done right.
The ones I keep in my hand 95 percent of the time are the Loon Outdoors five-inch Razor Scissors. I consider these my all-purpose scissors. They are comfortable to hold. They are extremely sharp, surgical-quality scissors that work superbly for precision cutting. Micro serrations on each blade amplify their ability to make short work of difficult-to-cut materials, including hair and synthetics.
Loon Outdoors Razor Scissors
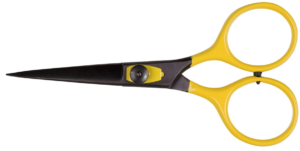
I haven’t found a tying task these excellent scissors can’t handle. Deer hair, tight spots, even difficult materials to trim are no match for the micro serrations on the blades. Never in a million years would I have once said that better scissors could up my game overnight, but I was amazed how much better my flies started looking.
EP six-and-a-half-inch scissors
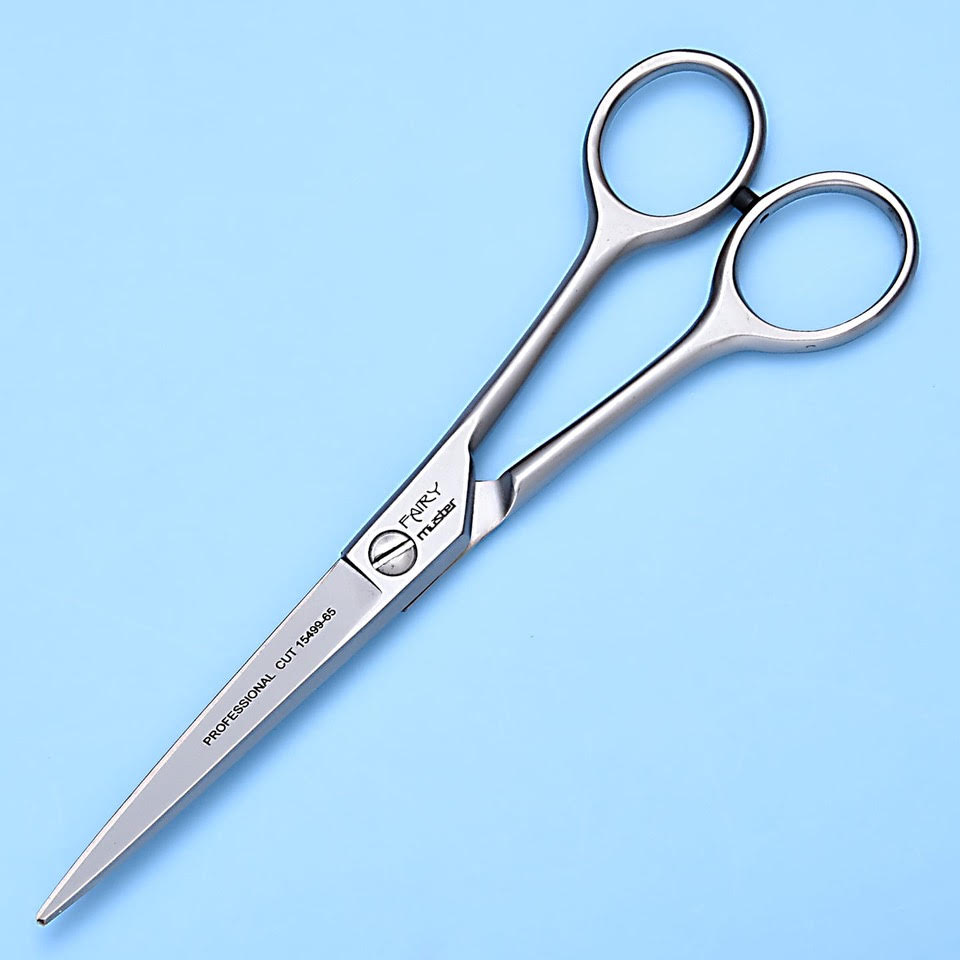
For shaping larger baitfish flies I find that the longer blades on the EP six-and-a-half-inch scissors work exceptionally well for keeping my flies symmetrical. The key is the extra length of the blades and how they cut. When shaping larger flies you really want to avoid short, choppy cuts. For only one or two flies, the handles really don’t make a big difference—but a comfortable grip is definitely preferred when you have a couple dozen flies to trim.
One feature that does take some getting used to, though, is the size of the finger loops. They are slightly smaller than what I was accustomed to. For the first day or so it took some time to acclimate. After several weeks of steadfast use, they feel completely natural in my hand.
Bobbins
Much like a fly reel, a bobbin is simply a tool that holds and allows you to control the line or, in this case, the tying thread. Like most everything else in the fly-fishing and fly-tying world, there are countless manufacturers, styles and options to choose from. Much like a fly reel, the price of a bobbin tends to fluctuate based on the materials used to manufacture it, and for the more expensive ones the type of drag system or tension control option they offer.
It would be next to impossible to test them all, but I can say I have experimented with a good many bobbins. I tend to gravitate toward the small, high-quality yet simple ones. For the vast majority of flies I tie, I don’t particularly care for an over-sized thumb grip, extended tube or any type of drag or tension control feature. I guess I’m just set in my ways, but I learned to control the tension of the thread with my pinky finger and palm. And if you really needed to put the screws to it, then you could always make one wrap with the thread around the leg of the bobbin before sending it out the tube. I am most comfortable with a basic bobbin with very few bells and whistles… but this is just my personal preference.
My “go to” and most recommended bobbins are:
For me, a must have-feature is a short tube, 3 to 4″ with a ceramic or plastic insert—this keeps the thread from being tattered and allows me to work in close to the fly. I find that the longer the bobbin, the more difficulty beginners have, especially if you are using a pedestal vise. The distance between the bench and the hook is typically eight to nine inches; the longer “saltwater” bobbins are five inches or more with the thread spool. When the bobbin is hanging freely, this gives you only four inches or so of clearance—not very much when working with larger materials and flies. With many rotary vises, this distance is cut down dramatically when the head of the vise is inverted.
Commonly, a new tier applies material with too much thread out beyond the tip of the bobbin, inverts the vise to have a look at what he has done. When he lets go of the bobbin, and it hangs freely, it ends up resting on the pedestal base or bench. All the thread tension on the fly is lost. The thread and wound feathers unravel—or worse, the materials fall off the fly onto the bench. It doesn’t take too many of these frustrating episodes for a new student to call it quits.
Another characteristic to consider when choosing a bobbin is: how easy is it to thread and change threads? Even the most experienced tier breaks the thread here and there. It’s no big deal, unless it takes a month of Sundays to get back to business. The distance between the spool and the bottom of the tube is very important. The shorter that distance the harder it is to maneuver the thread into the end. Keeping that in mind, the diameter of the tube is important as well. One of the reasons I’m not in favor of tension- controlled bobbins is the time it takes to change threads. Granted, you will probably end up acquiring a collection of different style bobbins, all loaded up with different types and colors of thread, but until then it is important to take these potential problems into consideration.
Bodkin / Dubbing Needle
A bodkin is simply a needle with the non-business end stuck into a piece of wood, plastic, ceramic or other material serving as a handle. Sometimes a bodkin is referred to as a dubbing needle—they are actually the same tool. They have a million and one uses on your fly- tying bench. I find it handy to have a few of them lying around. Bodkins tend to hide on you in plain sight whenever you really need one.
It’s the perfect implement for delicate or messy applications such as gluing eyeballs on baitfish, spreading epoxy or picking out trapped fibers. The needle can be easily cleaned free from cured glue or epoxy with a piece of steel wool. Warning: never use your scissors! Bodkins are pretty cheap and readily available online from a variety of manufacturers. They range in price from $2 to $20.
While you can make one yourself, some times the commercially produced ones can be a better mousetrap when it comes to the handle shape, so here are a couple of my favorites which I use myself.
Unlike many specialized fly-tying tools, you can easily make a bodkin yourself. What you need is a sturdy needle—one and a half to two inches—works best—and a handle that you like. When choosing a handle for your bodkin, do your self a real favor and make sure that it has a few flat spots on it. Bodkins with round handles tend to roll… And the last thing you want is a weighted needle stuck in your foot when it rolls off your bench.
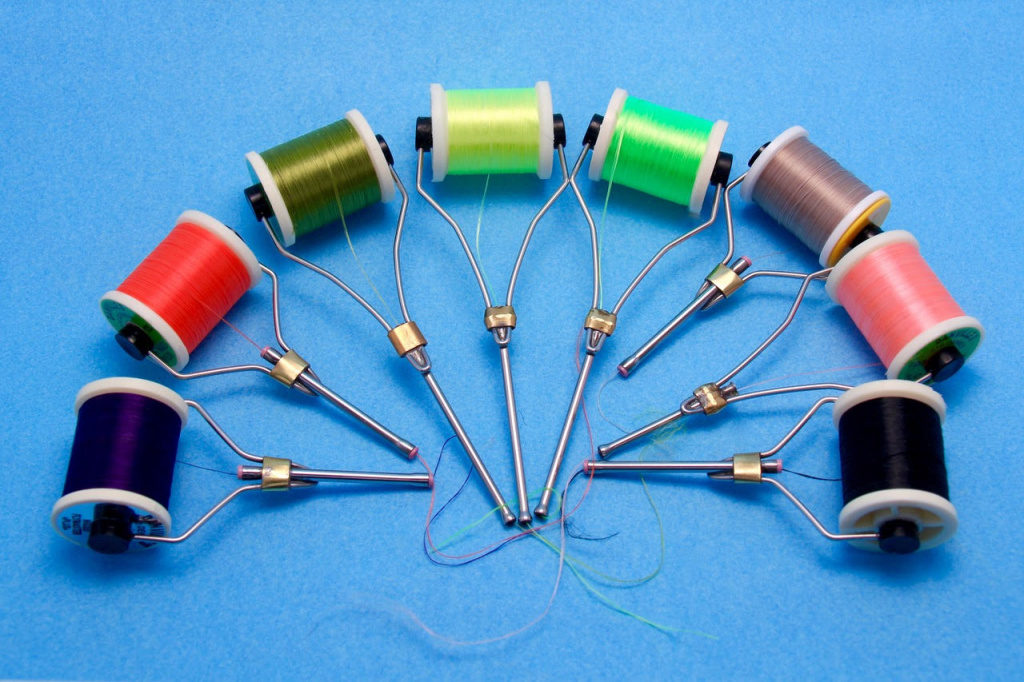
Dubbing Spinners
I have a drawer full of different dubbing twisters I have experimented with, but most are far too frail, large or over-engineered for my liking. Sometimes simple is best. The one I reach for most of the time is made from nothing more than a paperclip and a brass tube. Along with its simplicity, I prefer this tool over the rest because of its rigidity and durability.
Most of the saltwater flies I create are tied on notably large hooks. It typically takes eight to 12 wraps to palmer the loop around the shank of the hook to create a collar or body. Because of this, often times you need to stroke back the longer hairs of coyote, rabbit or other natural fur with each turn to keep from trapping fibers. To do this you need to apply significant pressure to the loop and tool while making sure not to put any slack in the loop. With other two-prong dubbing spinners, the flimsy wires seem to break after tying a dozen or so flies. The more sturdy one-wire spinners are typically affixed to a multi-tool handle too long and cumbersome—a real pain to work with, let alone throw in your tying bag.
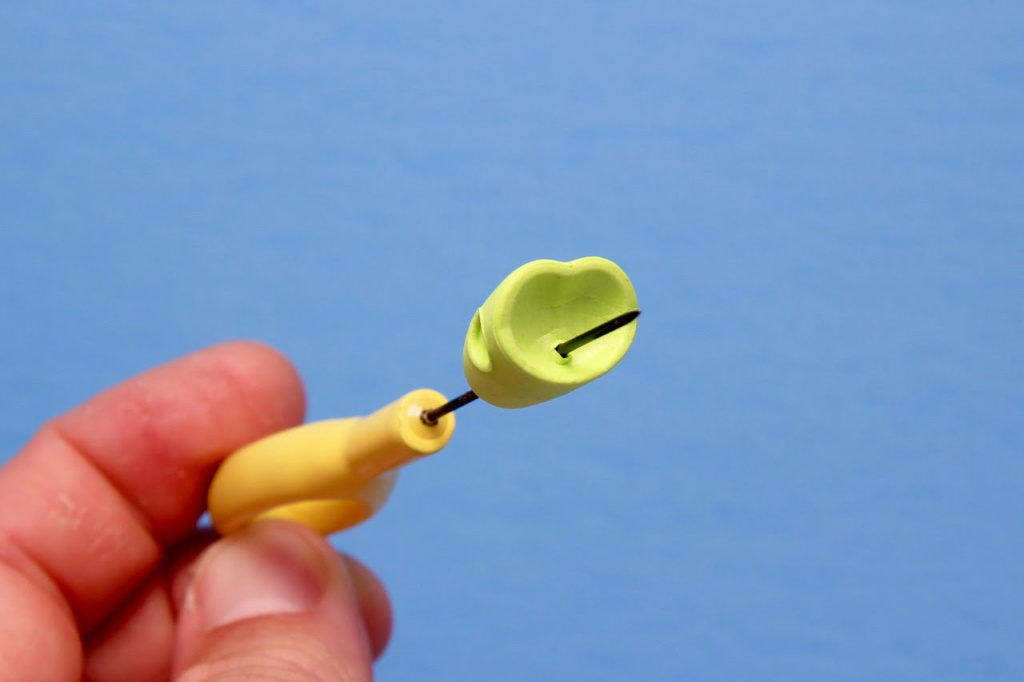
The exception is Loon Outdoors Gator Grip Dubbing Spinner with the hook attachment pictured above. It’s short and compact. I like to use this spinner when I am production tying and I have already cut away the tying thread, because it is much faster than using a paperclip/wire style tool and whip finishing off the loop. When using a long loop and the Loon Spinner I simply double the length of the loop and whip finish with the loop itself.
If I’m tying one or two flies for myself, or doing a teaching demonstration, I like to keep it as simple as possible. My homemade spinner is easily passed between hands and over the vise without loosing tension on the loop, because it is much smaller than standard dubbing spinners. It doesn’t bend or break. And because the loop is almost closed, the thread loop rarely slips off when palmering with the tool in hand.
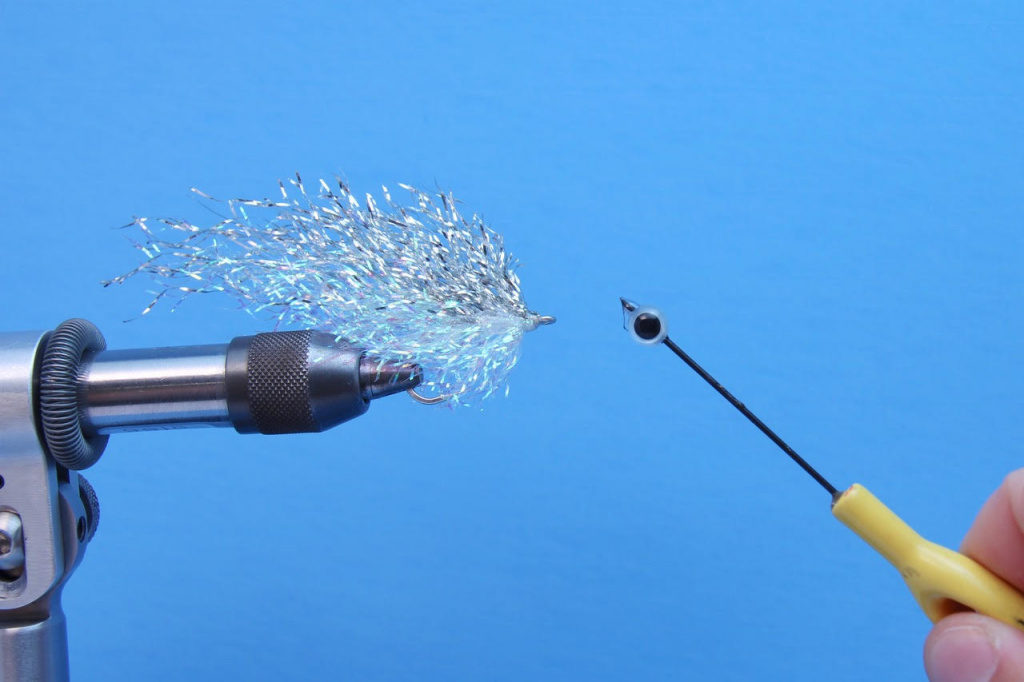
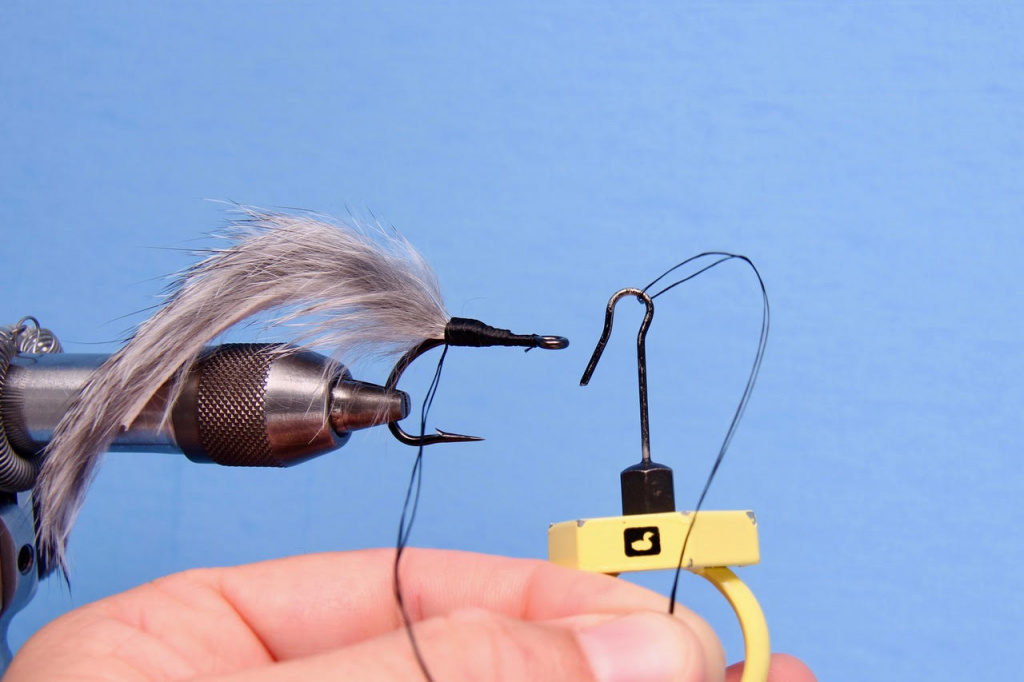
Finger Dubbing Brush
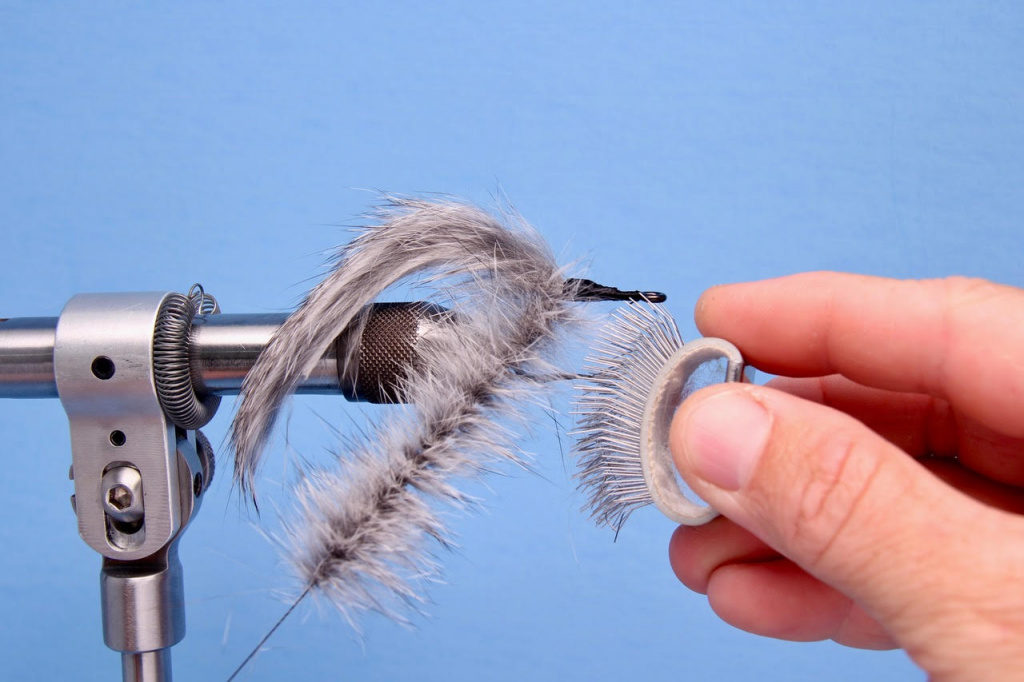
A finger dubbing brush is a handy little tool. It’s a must-have for your bench as well as your fishing bag. The head of the brush is made up of dozens of little L-shaped wires that work wonderfully for untangling and separating the fibers of larger saltwater flies.
Unlike a standard stiff wire brush, the wire teeth in a Finger Dubbing Brush are more spaced out. They are mounted in rubber. This provides a little more give and flexibility to the wires, which makes a huge difference when combing through materials. This is important when working with delicate flash or synthetics that can be easily damaged when pulled.
I use this tool primarily to comb out baitfish flies. Before trimming, a few passes helps blend colored fibers for a more realistic look. It also releases any trapped hairs or knotted fibers. I like to carry a brush with me when I am fishing, too. After catching a few fish, synthetic materials are notorious for becoming knotted and matted from the slime that transfers to the fly while fighting a fish. A few quick passes on each side if the fly will remove the globed-up slime, restoring the fly’s shape and lifelike movement in the water.
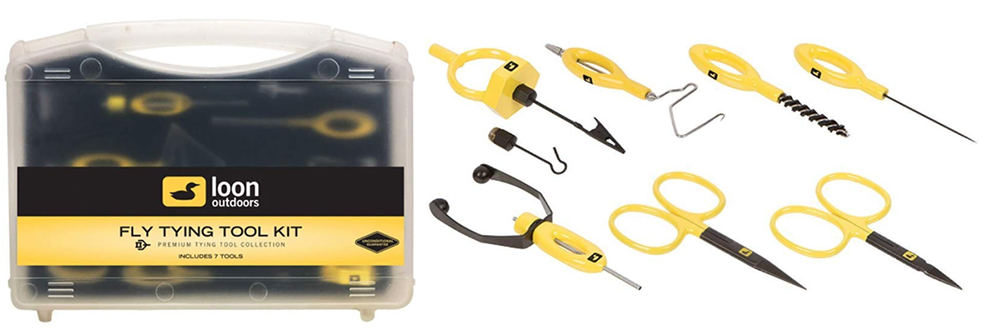
Consider a Combo Tool Kit
The other option to purchasing individual tools I have outlined above is to opt for a starter tool kit. Loon Outdoors has come up with a a good one that covers the vast majority of the tools I have outlined with the exception of the scissors.… and a few bonus tools.
It a very good collection, and you can always purchase any other tools that you may want down the road. This kit comes with a plastic caring case that’s quite handy for keeping organized. It’s also very nice if you plan on traveling with your tools. The hard case keeps you and your tools protected … no one want’s a puncture wound!
It just depends on whether you’re the type that likes an easy to grab kit with most of what you’ll need, or if you want to choose the best individual tools for specific tasks.
Razors
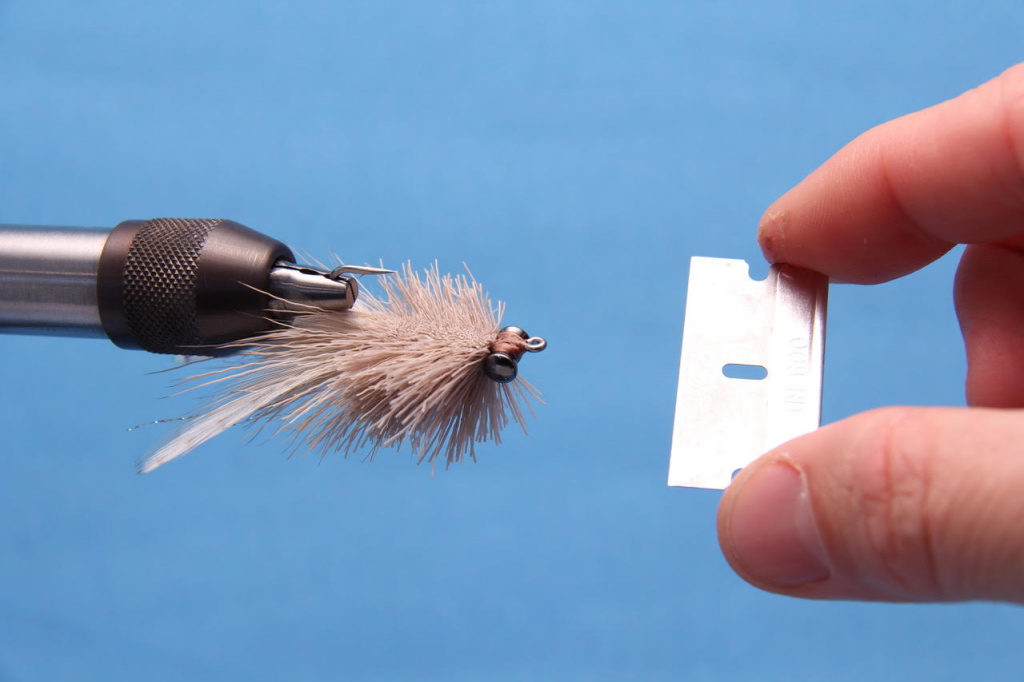
For stripping foam, cutting Zonker strips or shaping deer hair, there is nothing better than a fresh razor blade.
I like to have two types handy on my bench: single-edge safety razors and flexible double-edge razors. For most applications I prefer the single-edge razors. Their rigidity makes them easier to handle and far less dangerous that the double-edge models.
While you can pick them up nearly anywhere, I’m a huge fan of home delivery (which lets me spend more time tying and fishing instead of running around town) so I usually get these from Amazon and they work very well.
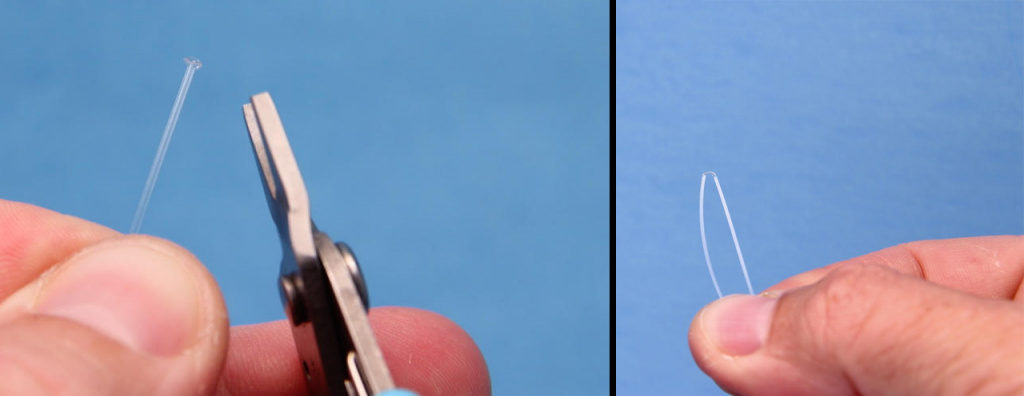
The only time they are outdone by the double-edge model is when cutting on a curve. By slightly pinching the end of the flexible metal, the razor can be bent into a curved shape. This is extremely useful when shaping deer hair bugs—but it’s not exactly the safest procedure. I prefer to cut them in half with a pair of rubber-handled kitchen scissors. If you don’t have an old pair, you can very carefully fold them in half lengthwise until they break into pieces. They are much easier to work with when you are managing only one cutting edge.
Cauterizer
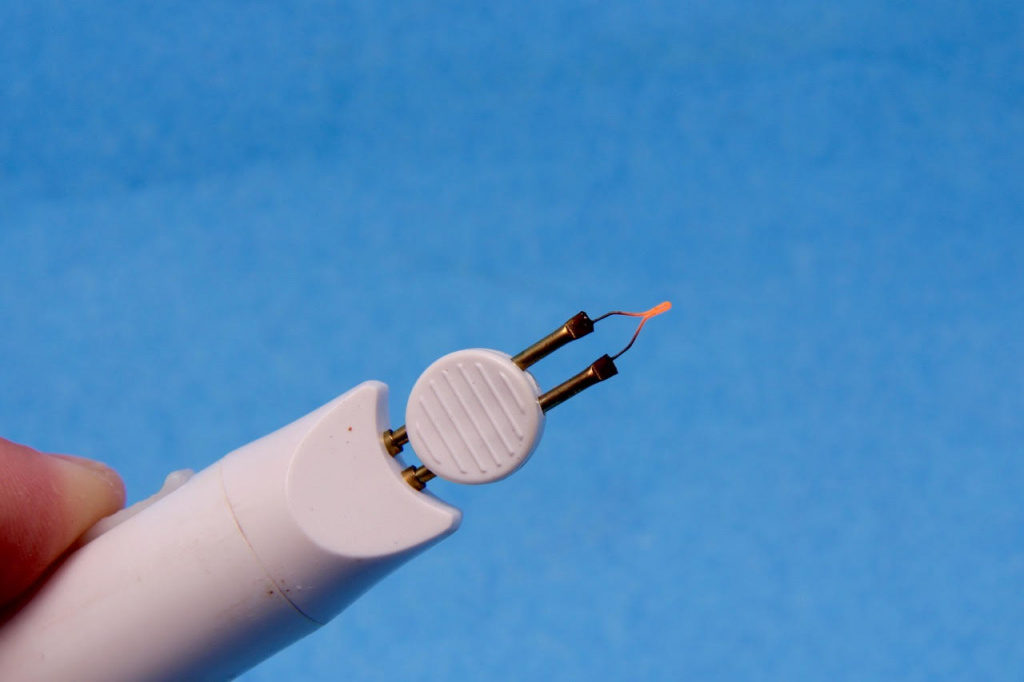
Battery powered cauterizers are a penlight-sized tool that weighs approximately 3 oz. With a push of the button the disposable wire tips heats up to 2200 degrees F in less than a second. Once rocket hot the tip makes short work of unruly hairs or fibers that you just couldn’t seem to get with your thread. It perfect for cleaning up the eye of the hook when working with deer hair or other material where trimming the butts is difficult.
Just be careful that you don’t apply any type of flammable head cement before putting the finishing touches on your pattern… I have to admit I found out the hard way and touched a fly or two.
In the past you had to have a pal that worked in a hospital to get your hands on one of these, but now there are readily available on line or at most high end fly shops for about $25. Two AA batteries will keep you in business for 35 to 40 continuous minutes of use, but most of the time you will just need it for a few seconds to burn away a few fibers or hairs. Replacement tips are also available.
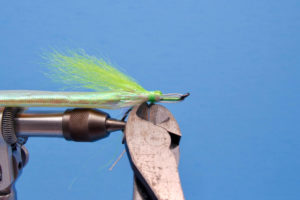
Smooth-Jaw Needle-Nose Pliers
Needle-nose pliers or, better yet, thin jewelers pliers are a must when flattening out monofilament for bending down weed guards or opening the gape of a hook. My favorite pair have a thick rubber handle, so I can apply maximum pressure without battering my hands. The most important feature to look for is smooth jaws. If you go with a checkered or textured jaw, you end up putting jagged gouges in your hook and pretty much destroy the monofilament.
My favorite is the Xuron 475 Short Nose Pliers. They’re easy to handle and don’t have a long jaw that would get in the way.
Side Cutters
When planning to cut bead chain or wire, save your scissors and pick up a pair of mini side cutters. You’re not going to need to apply a lot of pressure, so find the smallest pair you can. They are only a few bucks at most hobby or craft stores, but they are worth their weight in gold. They are also the perfect tool for cutting wire leader for Cuda flies or other toothy critters. I have a pair on my bench and one in my travel tying bag as well.
Battery-Powered Trimmers
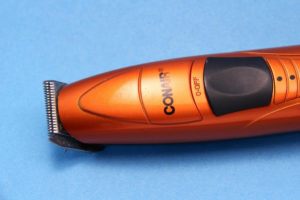
I would classify battery-powered trimmers in the nice-to-have category as opposed to need to have. They are not only a fantastic tool for evening up your sideburns, but they also make short work of difficult-to-cut synthetics. I like to fire mine up when shaping large batches of Five-Minute Finger Mullet patterns. I hold the trimmer stationary and turn the fly with the rotary feature of the vise. Much like a chisel and wood lathe, the combination cuts a perfect cylindrical shape. And you don’t have to worry about accidentally biting down on the hook with your favorite pair of scissors. Once you get the basic shape of the fly cut out, and the hook exposed, you can then go back and touch up the fly with your scissors.
I’ve found the Conair “The Chopper” Battery Operated Beard & Mustache Trimmer to be reasonably priced and durable.
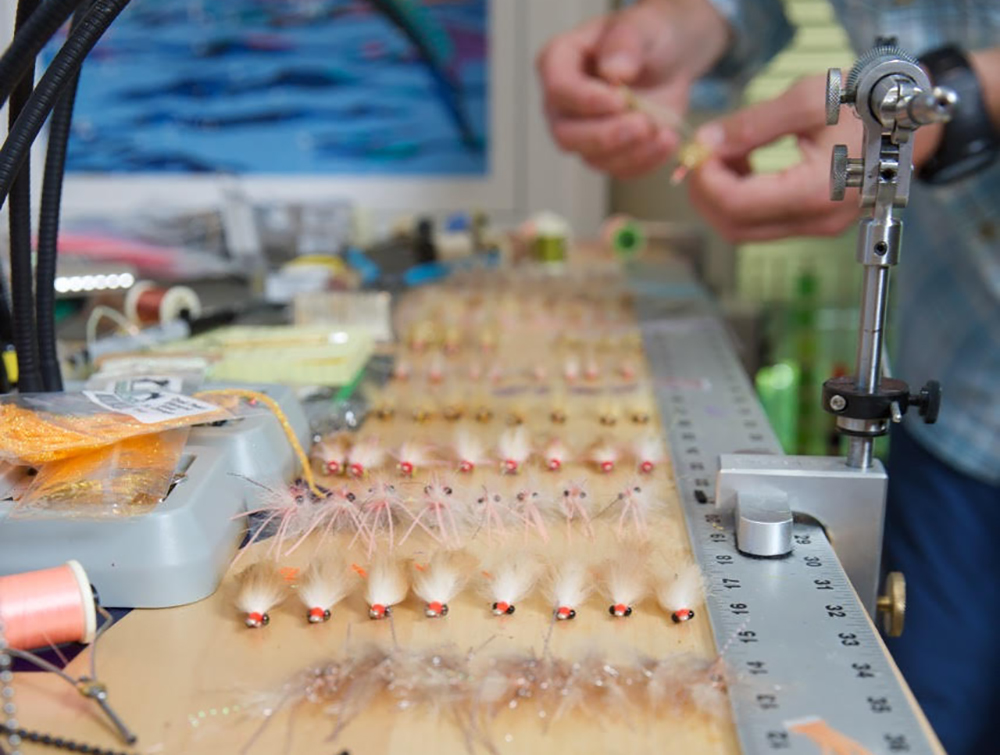
Fly Tying Bench Organization
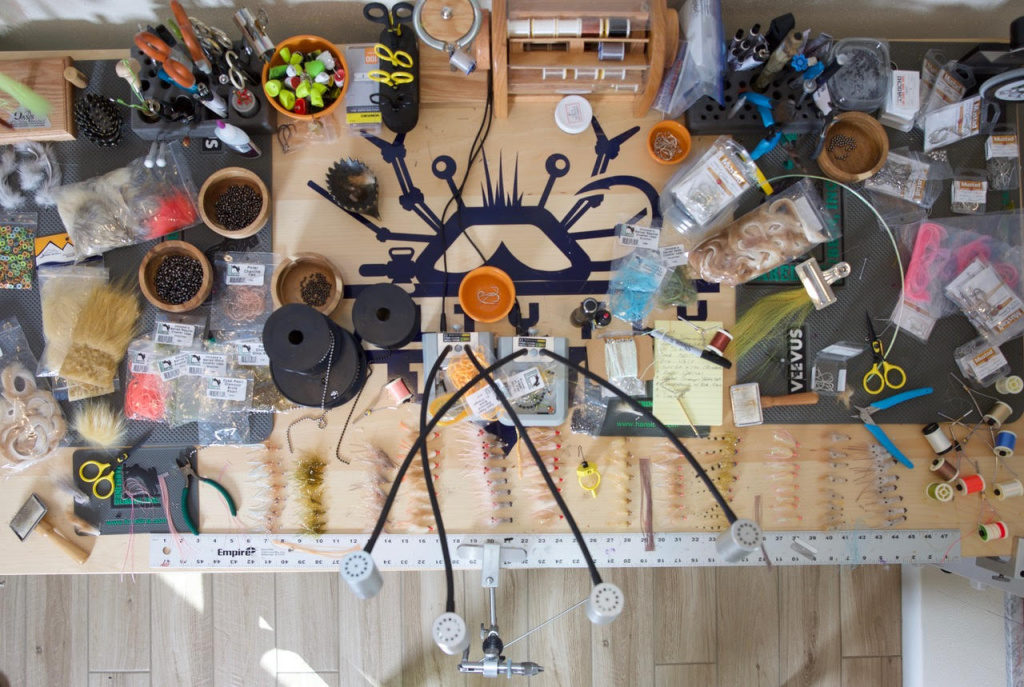
During my time of tying flies commercially, I have learned a lot about time management and shaving time without sacrificing quality. It doesn’t take too long before you realize that it’s not the actual tying process that takes up the bulk of your time—it’s the stocking of materials, preparation, setup and takedown that can gobble up hours of your day. Misplaced tools and disorganized materials are a quick way to derail your productivity and the quality of your creations.
Whether you want to tie multiple flies that look nearly identical or you just want to get better at tying in general, it is important to lay out all your materials in advance and tie in stages. Pre-measured, mixed or cut materials make this easy. However, a gust of wind, a rambunctious child, or an accidental flip of the ceiling fan switch has sabotaged this system more times than I can remember.
One tool that I have adopted and use every day for just about everything is a foam material holder. I use a couple of different styles depending on the application, but these devices are pretty simple. Sheets of foam with multiple slits are cut in the foam so materials are securely held in place and are neatly organized at your fingertips. I used to make my own, but after all my compadres and students wanted them, my friends at Hareline Dubbin started manufacturing them for me.
Chicone’s Material & Fly Prep Station
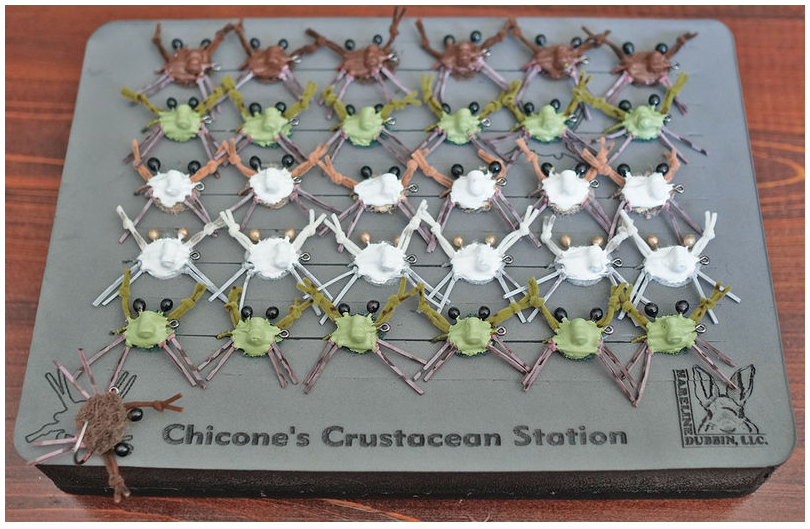
For holding flies or gluing up crab patterns I use a larger foam pad I call my Crustean Station The slits are cut deeper into the thicker foam. This allows me to keep the flies firmly in place while they cure. The Crustacean Station will hold up to 3 dozen flies in place for uniform finishing.
Bobbin Origination
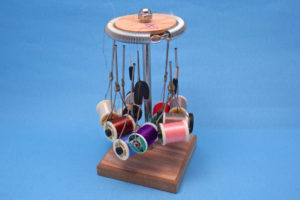
Multiple bobbins loaded with the color or colors you are tying with takes the headache out of break-offs and allows you to quickly recover without your painstakingly placed materials slipping off the hook and onto the floor. This handy Bobbin Wheel not only keeps your thread from hiding under the craft fur, but it frees up space on your bench.
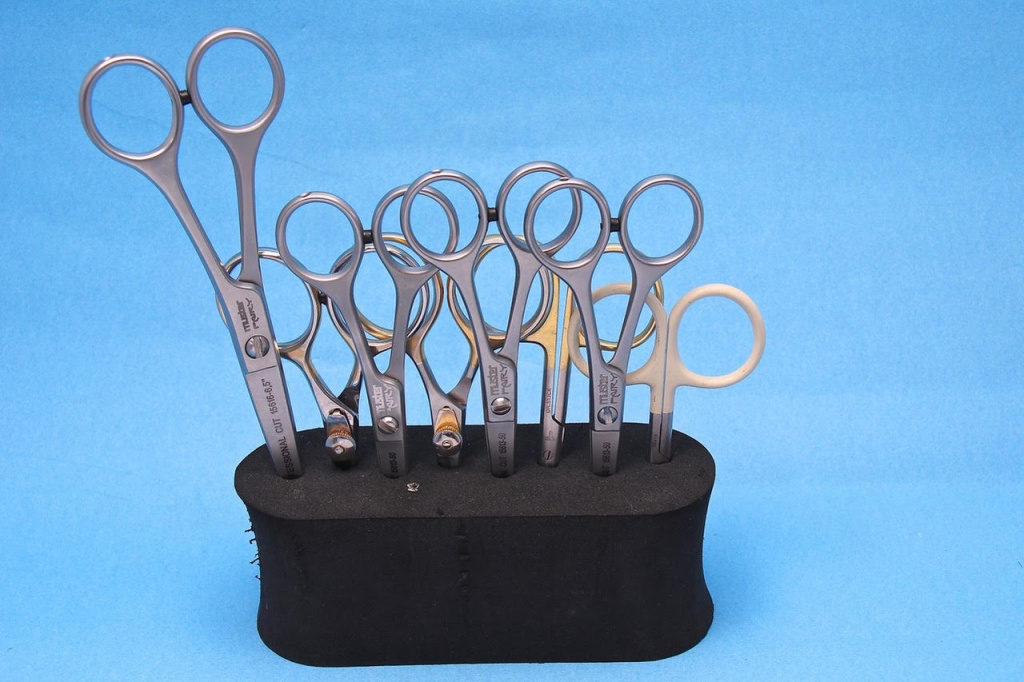
Foam Tool Caddy
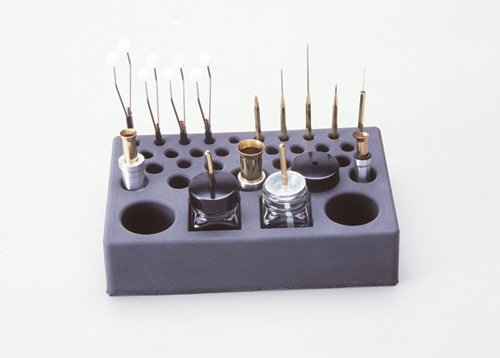
Renzetti’s Soft Foam Tool Caddy is convenient and relatively inexpensive if you have the room on your bench, but I find that there’s a lot of useless space in the foam block that I do not use. For the tools that I use most, like my scissors, I like a simple block of foam (this one came from an old bow quiver) with a few small holes punched in the top. It doesn’t take up a lot of room, and I can bring this with me when I travel as well.
Sparkle Spinner
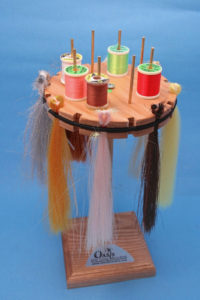
Last but not least is the Sparkle Spinner by Oasis. Up until now, I didn’t leave flash out on my bench, just because I have so much of the stuff, and It has a tendency to get ruined very quickly if left out of the bag, or go airborne and end up stuck to the dog. The Mrs. picked this up for me for Christmas, and I have to say it is growing on me. There are definitely a hand full of flash colors that I use much more than all the rest (pearl, black, root beer, hot orange, silver, and gold) and it’s much easier to reach up and cut one or two strands off rather than digging through a plastic storage bin. The eight brass pins mounted in the top of the spinner also provides storage for 16 spools of thread.
Fly Tying Materials for Beginners
When it comes to buying materials for tying your own flies, a good place to start is with the fish you are targeting. If you’re new to saltwater fly fishing, determining what flies you need for a particular species of fish can be a daunting task. Although there are numerous variables to consider, a few basic principles can simplify the selection process and reduce your startup cost and storage space. Whenever possible mimicking the indigenous prey items is best, but if you’re exploring uncharted territories or fishing a location for the first time your box needs to contain an arrangement of utility patterns that have proven effective in a number of conditions or can be easily modified on the water. For more info on this check out my book Feather Brain.
Markers
The Original Chartpak AD Markers, Tri-Nib, 25 Assorted Landscape Colors
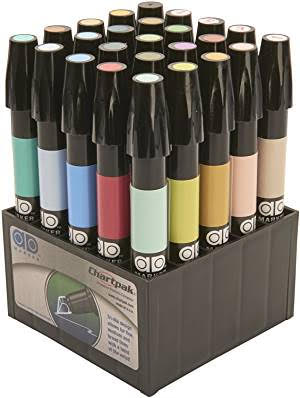
Almost all saltwater flies we tie are made to look like three primary prey items: shrimp, crabs or baitfish. Once size or color doesn’t always work. There are times when a specific color or pattern cannot be created with tying techniques or specialized materials. To make your flies look more realistic and appealing to both fisherman and fish, at times a few finishing touches need to be applied after you have completed tying the fly.
Permanent markers are an excellent way to add a pop of red to simulate gills or a few swipes of black to produce vertical barring on your pinfish or shrimp patterns.
When barring the wings of small bonefish flies, start with a thin line on the far side. The color will bleed through the material enough to act as a guide for the line on the side closest to you. For larger bars, push the edge of the marker directly into the center of the materials. Simply let the color bleed through both sides of the material.
The majority of bonefish flies mimic little shrimp or crustaceans with segmented bodies. The easiest way to imitate them is by barring the wing of the fly with a marker. While the fly is still in the vise, gather all the fibers of the wing material and pull the material taut. Start by pressing the marker against the material on the side away from you. Hold it still until the ink bleeds through the material and can be easily seen. Mark the side closest to you where you can see the ink has bled through—your bars will always match on both sides of the fly. This is much easier than leaning over the vise or craning your neck to line up the marks on the far side.
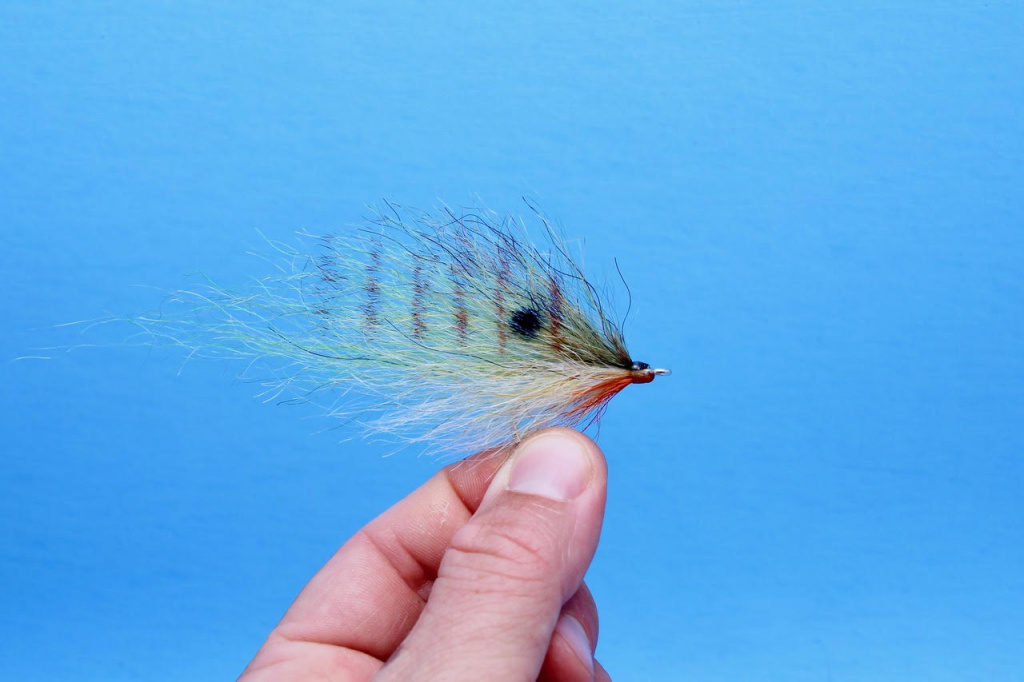
Once I get on the water, I like being able to adjust my fly on the spot. A few extra markers don’t take up much room, whether I am wading or fishing from a boat. Tie up and stash one all-white baitfish fly in your box. Think of it as a blank canvas—it might be just what you need to save an unproductive day.
Frequently, when I am traveling or fishing somewhere new, I tie up a few four- to five-inch baitfish patterns in all-white and pack a few extra colors of marker instead of hauling dozens of different colors and sizes of flies. I trim and mark up the white flies to match the size and color of bait in the area I am fishing. Most of the time, when the fish are turned on, it’s for a narrow window of time. You don’t have time to sit down and whip up a new fly. Packing your vise and a variety of materials for half a day of fishing is silly. Instead, be smart and bring a variety of blank-canvas baitfish, shrimp and crab patterns that can be easily colored up in minutes.
My favorite markers are the Charpacks in the natural landscape colors. This assortment provides a wide array of natural tones perfect for matching the colors on critters found in nature.
UV Acrylics
Solarez Thin Hard Formula
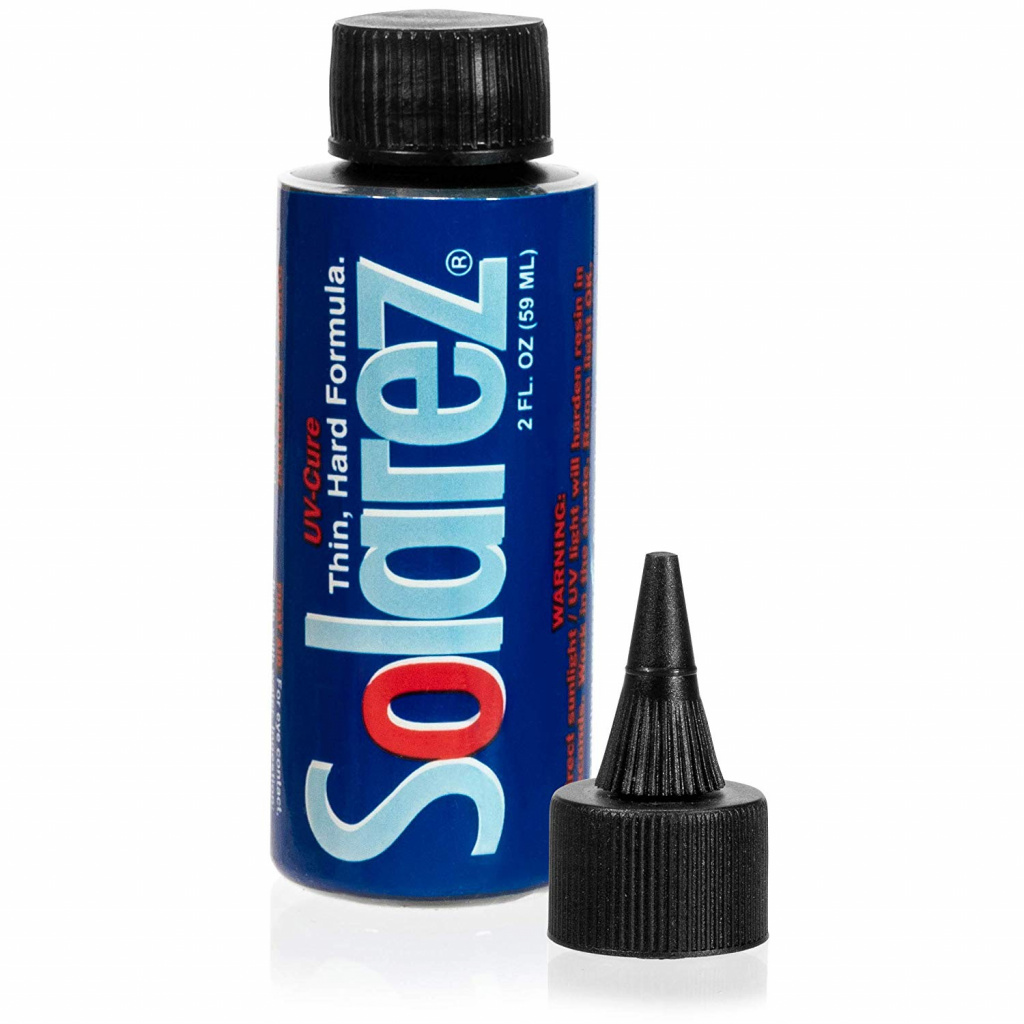
Thanks to their clarity, durability, quick curing times and odorless attributes, UV curing acrylics have become extremely popular during the last few years and become excellent replacements for Clear Cure Goo and other epoxies. Numerous manufacturers have entered this fast-growing market, offering dozens of UV curing products far beyond standard clear acrylics. Powdered pigments, tungsten or glitter can be mixed in to enhance the look or action of your fly. Different viscosities offer tiers a range of options for a variety of intended applications.
Although I have used many of the products out there, for most applications my favorite is Solarez. Their Thin Hard Formula is easy to work with, cures in a few seconds and it penetrates easily into thread. Once cured it doesn’t have a tacky residue and it wont peal crack or yellow like other products. While there are other formulas available, this is the one I use the most. Start with this and then you can experiment with their other formulations once you get some fly tying experience.
IMPORTANT: Any UV cure resin will need the correct UV spectrum light for it to cure properly, so if you do pick up some Solarez, be sure to get their light for optimum performance or you may find it doesn’t cure properly and leaves you with a gummy or tacky finished product.
E6000 Glue
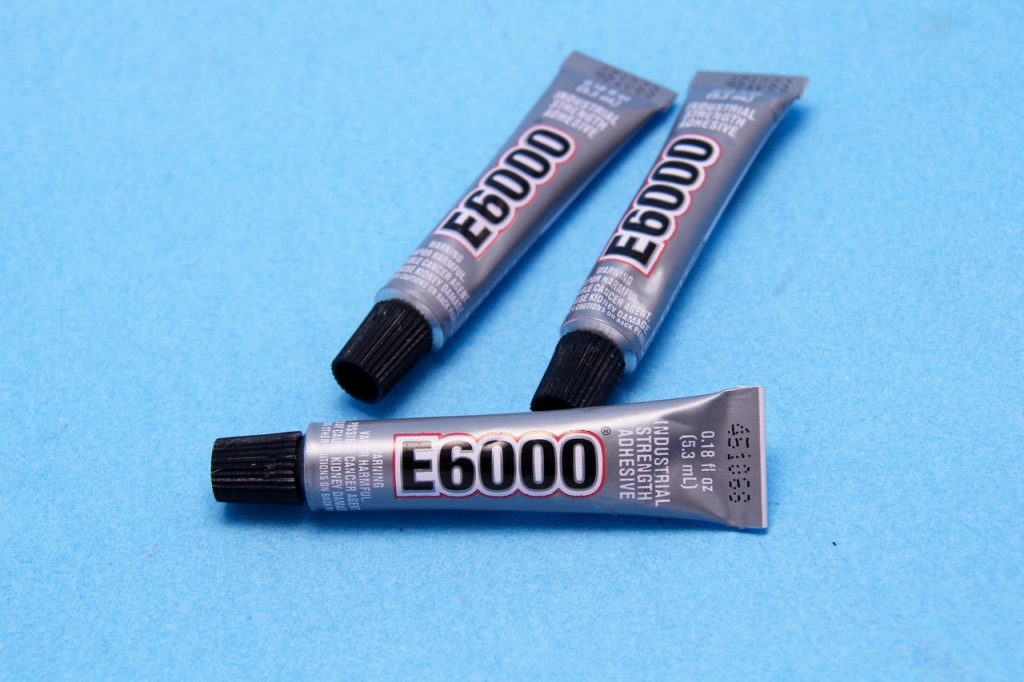
During my 10 years of teaching fly tying, I have been asked all kinds of bizarre questions concerning materials and techniques. Without a doubt the single most frequently asked question is, “What kind of glue do you use to attach eyes for baitfish patterns?”
E6000 is unequivocally the best adhesive I have found for gluing on dome-style eyes. E6000 is an industrial-strength adhesive. It comes in a metal tube with your choice of large or small applicator tip. Trust me: make sure you buy the one with the smaller tip. It keeps the glue from drying out quite so fast, and you don’t get it all over everything if you inadvertently apply too much pressure while squeezing it out. You really don’t need to use too much of it, either. A pea-sized drop or enough to cover the back of the eye gets the job done. It’s not too thin and dries quickly. It’s waterproof. And once the eyes are glued on, they do not come off! That said, if for some reason the eyes shift while drying, or you accidentally glue them on cockeyed, its better to start tying a new fly rather than messing around with pliers and a razor blade.
The only grievance I have with this product is the noxious fumes, which are not uncommon for adhesives like this. Just make sure you have good ventilation if you plan on glueing up a batch of flies. I try to put the cap on after each application as well. Otherwise you end up getting a little lightheaded, to say the least.
Getting Started Tying Flies
When loading up your fly box for Florida’s saltwater species, you want to make sure you have 4 general categories covered; Clear water baitfish patterns, off color baitfish patterns, crab, and shrimp patterns.
“Matching the Minnow” or prey items size and location in the water column is paramount to catching fish, so incorporating flies with varying sink rates and buoyancies in your battery of bugs is essential. In general, when fishing in stained or off color water, darker color flies have a tendency to be more productive. Shades of black, brown and purple silhouette, and are more easily seen in lower visibility. Working in a few strands of gold or copper colored flash is an excellent addition. In clear water situations, the forage tends to be void of color, so translucent or lighter colors like white, gray, or chartreuse patterns are more effective.
I like to tie a few blank canvas patterns in my box. No matter where I fish, I always pack one or two all white (Blank Canvas) baitfish, shrimp, and crab patterns that can be easily altered with permanent markers, depending on what I see on the water. 3 or 4 markers don’t take up much room in your bag, but they just might be just what you need to save an unproductive day.
One of my favorite categories of flies to teach beginners are bonefish flies. In comparison to other saltwater patterns, they are relatively simple to tie and most of them are constructed from similar materials and colors. Although the count of bonefish patterns existing numbers in the thousands, spend any amount of time around dyed-in-the-wool bonefisherman, and you will find that that the Pareto principle (also known as the 80–20 rule) definitely holds true. Only a small assortment of proven patterns earn their spot in their fly boxes, no matter where they intend on fishing. Much like Mexican food, countless offerings can be created from the same ingredients.
My go-to’s typically include a sampling of the following bugs in various weights:
- The Bone Appetite
- The Coyote Ugly Shrimp (regular & spawning)
- The Tranqu-hill-izer
- The Contraband Crab
- The Cocaine Coyote Squimp
- The Tide Slave (Orange, Blue, Purple)
- The Kung Fu Blue Crab
- Aaron Adams Big Ugly
- Jim McCoy’s Gotcha
- Chris Helm’s Jessie Special
- Charlie Smith’s Crazy Charlie
- Rick Simonsen’s SimRam
- Eric Peterson’s Spawning Shrimp
- Wil Flack’s Cocaine Crustacean
- Omeko Glinton’s Meko Special
As a former consultant, I fired up my laptop and laid out a matrix of the materials required to assemble them. The materials listed below act as a foundation for what materials you need to by to assemble them… and many many more. I rounded the list out so there would be 3 or 4 key materials in each category, and with the addition of 1 or two bonus materials, I realized the selection of flies that could be tied increased exponentially. Since some of the flies did not have a tail, used two to three kinds of eyes, or needed to be barred with a marker, I used a miscellaneous category to make sure I captured all the required items needed to assemble the flies. Here’s a list of what I like to recommend.
This should give you a pretty good foundation for bonefish flies as well as a good start for many other types of saltwater flies. As I mentioned before, you may need to alter the colors or hook sizes slightly depending on location.
Drew’s Tying Bag for Bonefish/Permit Flies
- Tools
- Bonus Tools
- Dubbing Brushes
- Marabou – Tan, Cream, Bonefish Pink
- Fur – Coyote, Arctic Fox (white), Finnish Raccoon (pink)
- Feathers – Whiting Farms American Rooster Capes
- Eyes– Mono Post (small & large), Bead-chain(medium & large), Dumbbells(5/32, 3/16)
- Ice Dubbing – Tan, Orange, Golden Brown
- Polar Chenile – Tan, Clear, Olive Brown
- Hooks – Daiichi, Gamakatsu, Mustad – 2’s, 4’s, 6’s
- Diamond Braid – Pink, Tan, FL. Orange
- Chicone’s Legs – Fl. Orange/Clear, Fl. Pink/Clear, Brown/Clear, Sand/Clear
- EP Fibers – Sulfer, Tan, Lt. Olive
- Kraft Fur – Sand, Tan, Pink
- Krystal Flash – Pink, Tan, Orange, Pearl
- Thread – Danville 210 Flat Waxed Nylon – Pink, Tan, White, Orange
- Misc.
- Magnum Zonker Strips – Lt. Brown (ginger), Tan, White
- Flashabou Minnow Body – Small
- Markers – Tan, Dark Brown, Orange, Olive
Beginner Fly Tying Tips
Creating Uniform Flies
For most seasoned tyers, It’s relatively simple to create one or two good looking flies that look pretty much the same. The difficulty, especially of new tyers is sitting down at the vice and tying a dozen or so identical flies. Some of this comes with years of practice and 1,000’s of flies under your belt, however there are a few tricks that can speed up the process
The first step to mirror image flies is where you start your thread. Often times you will hear directions like start the thread at the eye, bend or point of the hook. This makes it easy, however if you don’t have a way point like that to go on, the next best thing is to count your thread wraps. Start the thread at the eye of the hook, and leave the tag end a couple of inches long so you have something to hold on to with your non-wrapping hand. This will help to stack your wraps up tight and evenly. Once your wraps are even, you can determine at what point you want to start adding materials to the hook. This technique works very well for flies that utilize dumbbell or bead chain eyes that are not positioned at the eye of the hook.
The second tip for improved uniformity is preparation. Just like a Chef creating a complicated dish, you need to measure, cut and layout all your materials in advance.
If possible count number of fibers or hairs that will be used and keep it the same for each fly. If you are using a material that does not have individual fibers, cut enough of the material for the number of flies you desire to tie and lay them out in neat piles. Examine the piles and do your best to make them all even in length as well as portion of material. That way some flies will not be more sparse than others.
Although measuring with a ruler is best, chances are will not always have one available. If your flies are 1/8 of in inch shorter than what the pattern calls for it is not important, what is important is that all your flies are the same. Start using tools of measure that you will always have with you. I like to use my hands and fingers as reference points.
For most general-purpose saltwater flies (snook, redfish, trout) I use a standard length, size two hooks. If you measure from the eye of the hook to the bend the length will be roughly 1 ¼ inches long. This may vary slightly from manufacture to manufacture, however the principal for measure will remain the same. 9 times out of 10 the patterns will call for a tail of the 2- 2 ½ times the hook length, making the overall fly approximately 2 ½ – 3 1/8 inches long from the eye of the hook to the tip of the tail. I have found that measuring materials with my index finger is the easiest way to ensure that my flies are all the same length and approximately 3 inches long.
This works exceptionally well with difficult to work with materials like feathers. For large baitfish style patterns that call for multiple pieces that get consecutively shorter, I like to pre-cut all my pieces before the hook ever goes in the vice. For a 5-inch baitfish pattern, the longest section of material is initially 4 ½ inches before it is tapered on each end. On my hand I measure from the first line on my palm to the tip of my middle finger to achieve this. The next piece is 3 ½ inches long so I use my middle finger for is measurement. You get the point, measure your hand and figure out what the lengths of each of your fingers are. This will not only help you to create more uniform flies, but it will increase the rate that you tie them as well.
The Fly Tying Assembly Line
For patterns that use a lot of different types of materials I like to create and assembly line and tie in stages. Often times this process may take place over several evenings of tying. The important part is that you finish one stage at a time on all the flies before moving forward. This will require you to whip finish and reattach your thread several times before the fly is finished, but I assure the added effort will pay off.
Looking for More Fly Tying Info?
Hopefully this article will provide you with enough information to get started, but If you have questions, please feel free to shoot me an email at Drew@saltyflytying.com!
Once you are all set up and tying check my Instagram @drchicone for more pattern ideas! If you are interested in patterns for specific species or locations, check out my Books & eBooks.
A frustration of mine is trying to learn a new pattern or tying technique without clear illustrations or instructions. I subscribe to all kinds of fly tying magazines and have quite a few fly tying books, and I can’t tell you how many times I wish there was one more photo or I could have zoomed in on a picture. I think that most of us would appreciate more than 5 or 6 1-inch photos to thoroughly explain how to get from point A to point Z. That is one of the main reasons for the ultra close up shots and hi res photography, and excessive number of photos used to illuminate the ideas and techniques!
Until next time … Keep your wraps tight and your feathers straight!
Drew