
Where there’s bonefish there’s barracuda … and when the conditions aren’t ideal for bonefish you better have a rod loaded up with steal leader if you want to wrestle with these toothy critters. Most of the time it’s pretty windy so you’re going to need a little bigger rod than usual to launch this lengthy concoction out there as well! Although you can tie this fly in shorter sizes to make your life easier, I find that the longer it is the better! As for any Cuda lure goes… The key is the speed of the retrieve! Wide open, as fast as you can go! I have caught a few on a rapid single handed strip, but the vast majority of the time I have the rod under my arm and I’m stripping with both hands. This hand over hand method is much faster and is typically what you need to trigger the strike on bigger fish.
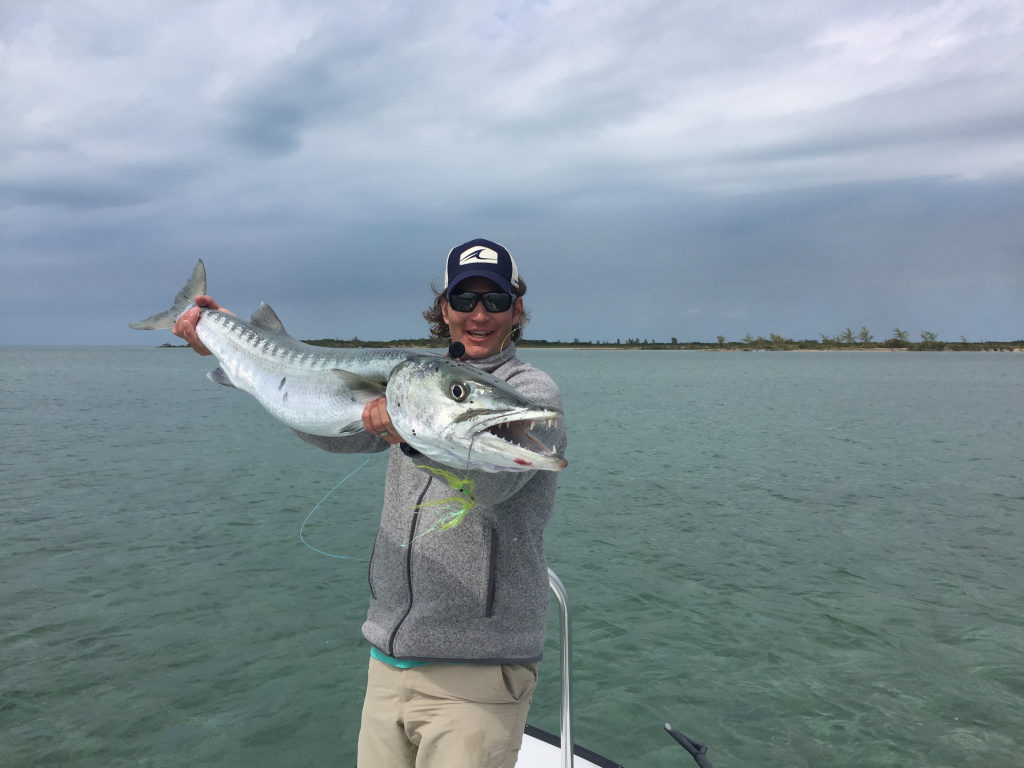
Anytime you are heaving around a 2/0 hook in high wind you need to be acutely aware of your surroundings and take extra care…But you add an inverted stinger hook to the mix and your chances of empaling yourself, fishing buddy or guide goes up exponentially. Although this fly looks terrifying with the sinister wide gap hooks, I named this fly the Nightmare Needlefish when I was tying it, not fishing it. After tying thousands of flies a year my habit is to stroke back fibers before applying more materials to the hook. I quickly discovered this propensity after burying the stinger hook in the outside of my left hand every time I tie these things! No matter how careful I am I always seem to find it at least once or twice…. So be careful!
How to Tie the Nightmare Needlefish Fly
Materials Required:
Hook: Mustad 412-NP Beak Bait Hook, Size 2/0 & 2
Thread: Chartreuse & Florescent Fire Orange Danville 210 Flat-waxed Nylon
Eyes: 7.5mm Florescent Yellow Doll Eyes
Inner Body: Chartreuse Yak Hair
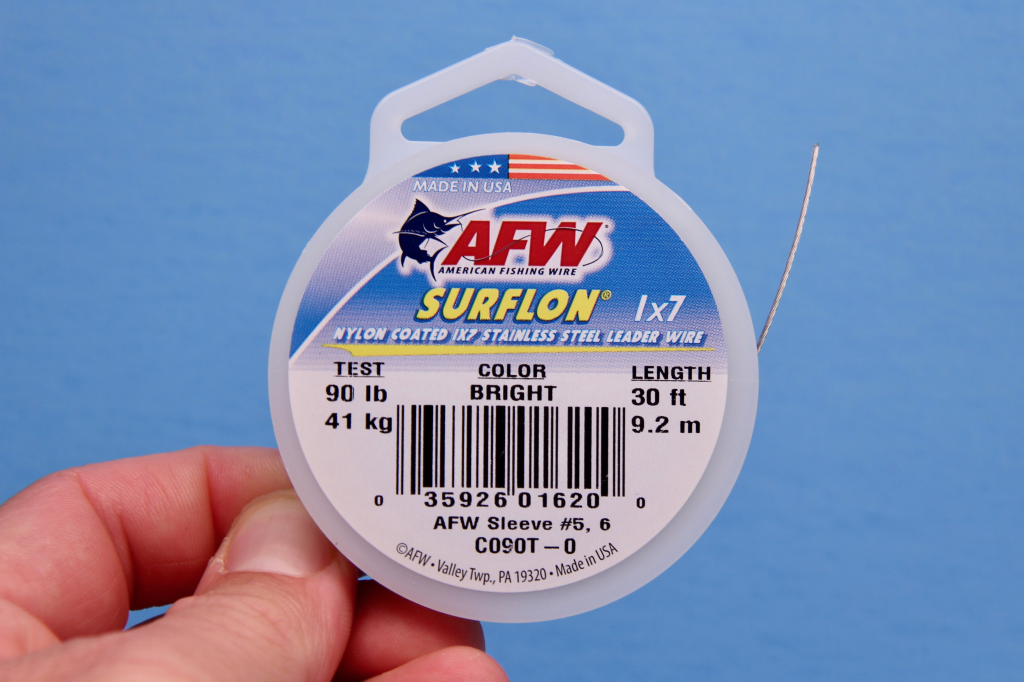
90lb AFW Nylon Coated Stainless Steel Leader Wire 1×7
Over Body: Large Pearl Flashabou Minnow Body
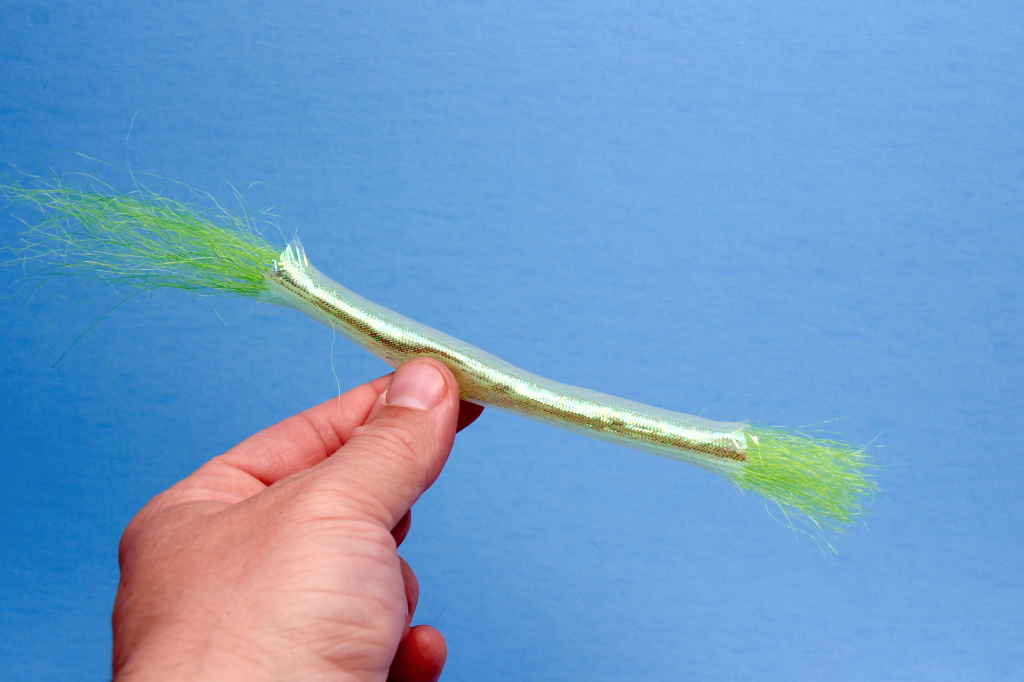
Adhesive: Loon Outdoors Fly Finish Thick
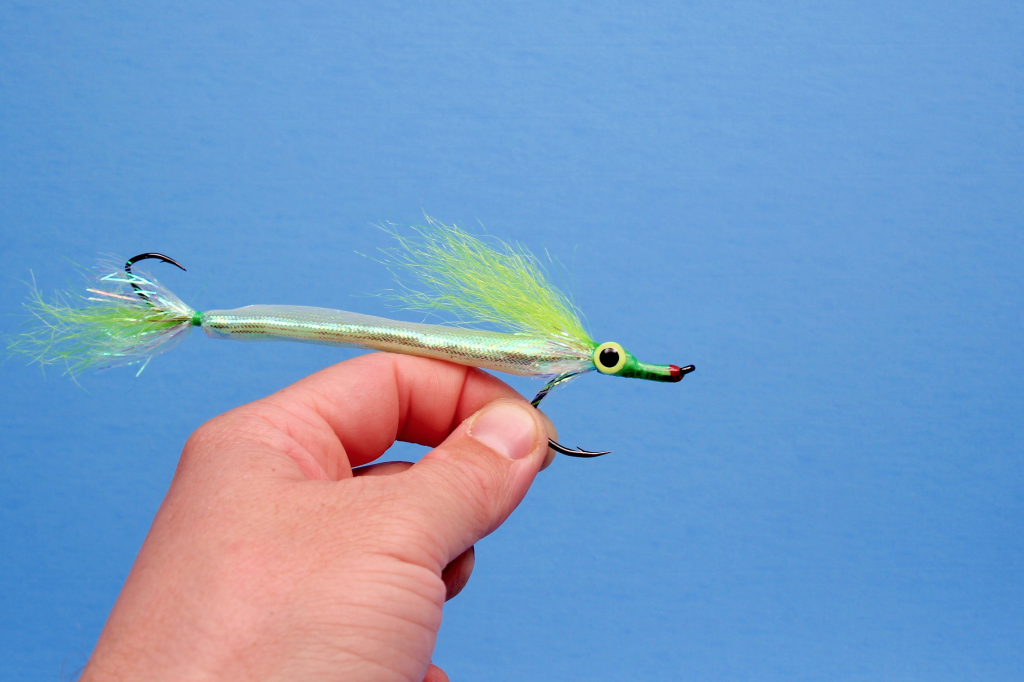
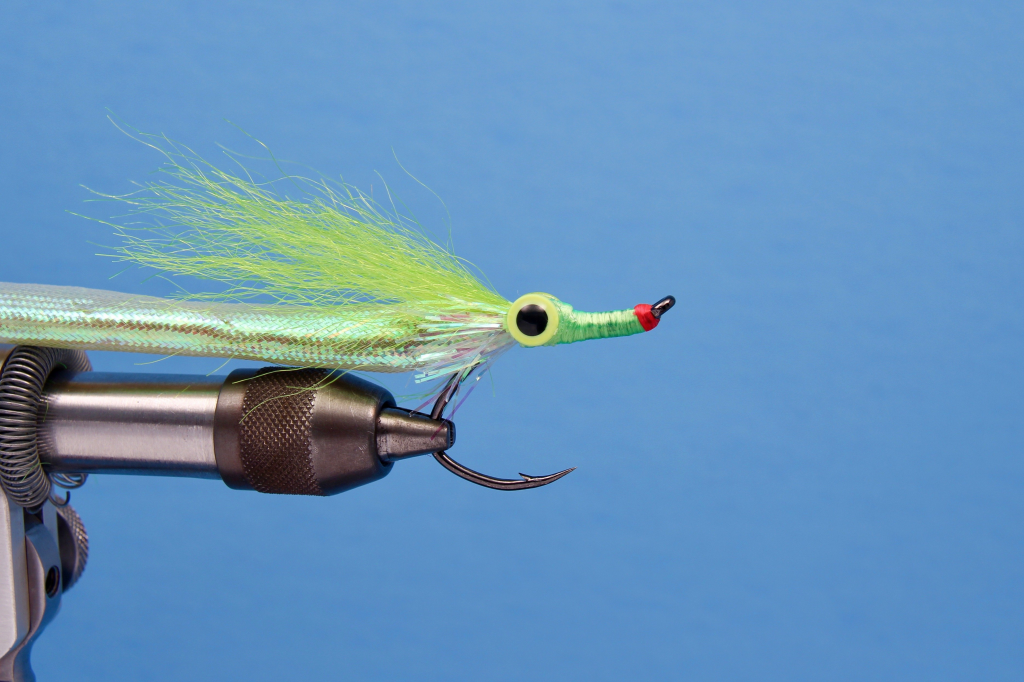
Here’s what the finished fly should look like:
Step 1:
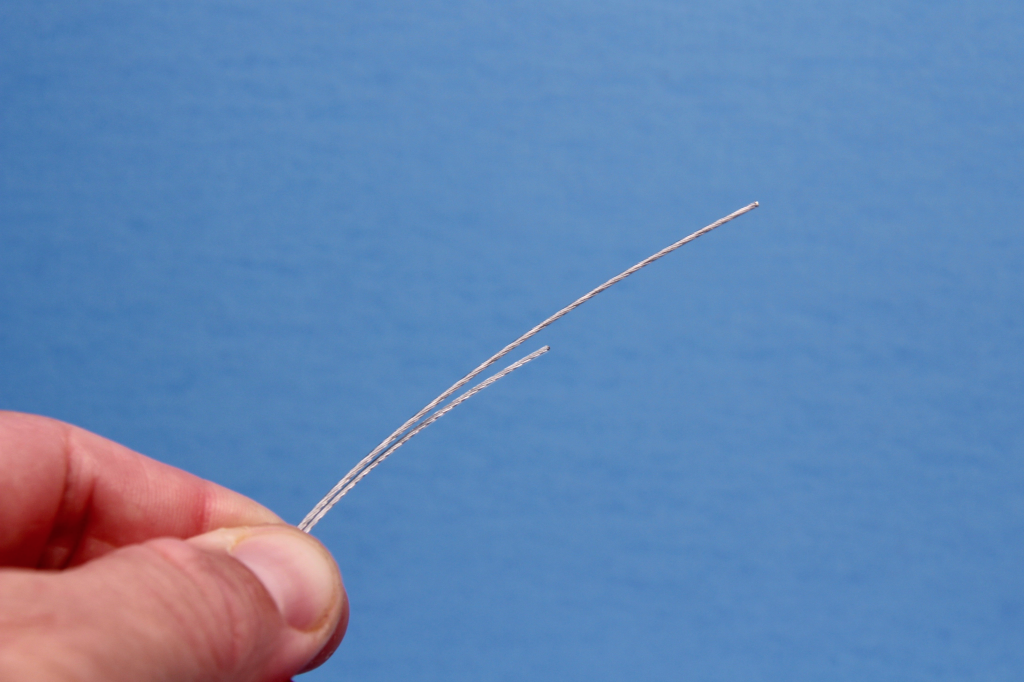
Start with a 14” piece of 90lb nylon coated stainless steel wire
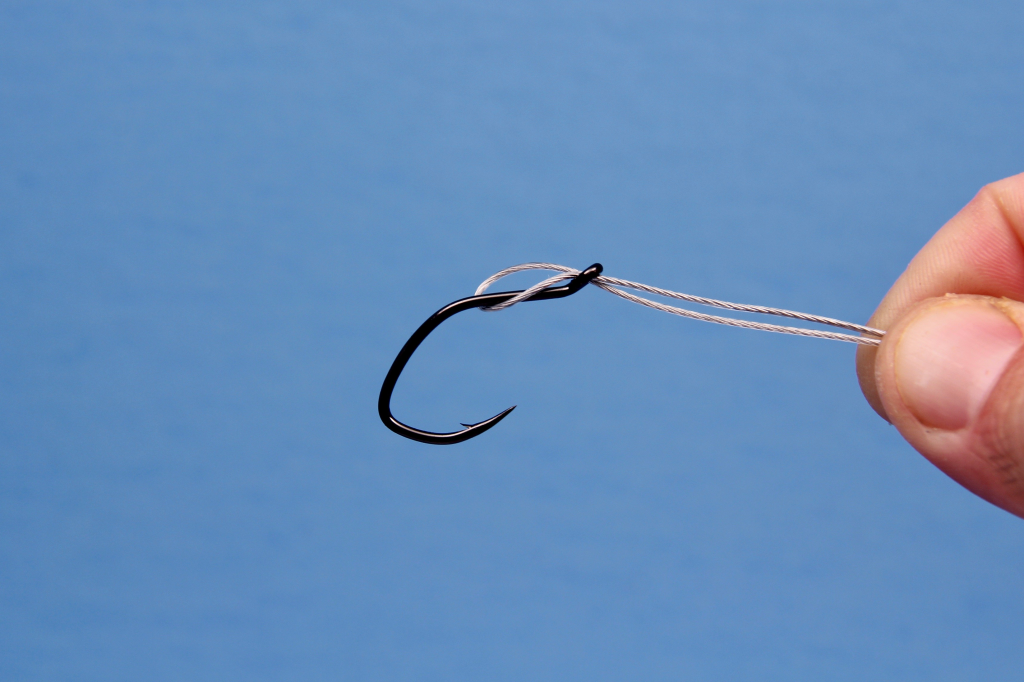
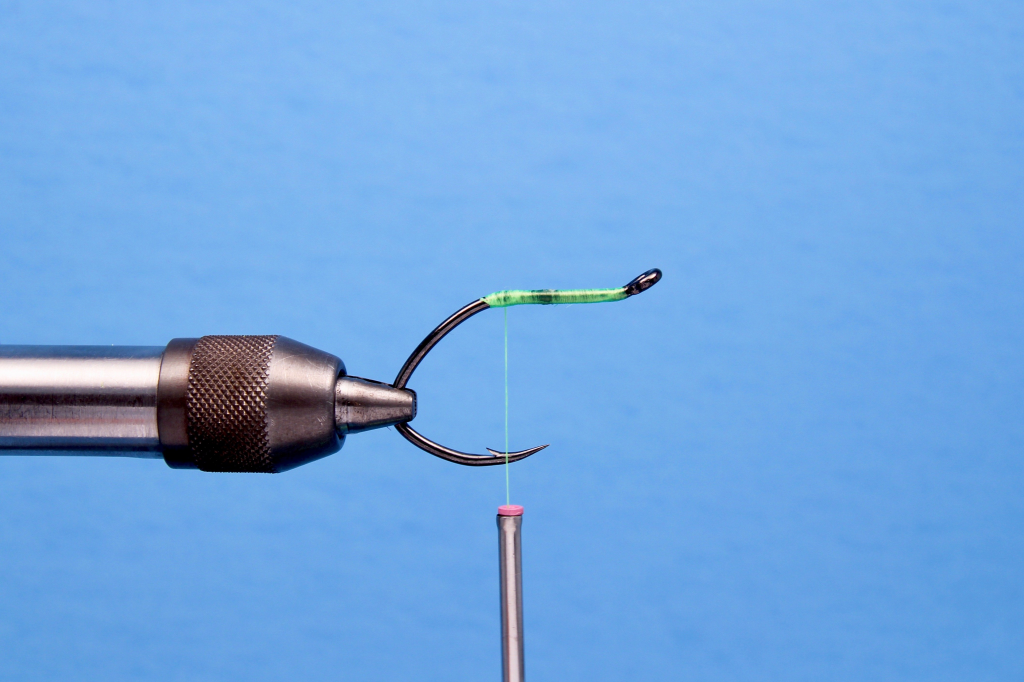
Step 2:
Hold the stinger hook ( smaller of the two) in your non dominate hand, hook point down, and feed one end of the wire threw the eye of the hook toward the bend. Pass the end of the wire underneath the hook shank and back out the eye of the hook.
Step 3:
Continue feeding the wire threw the eye of the hook until one end is approximately one inch longer then the other.
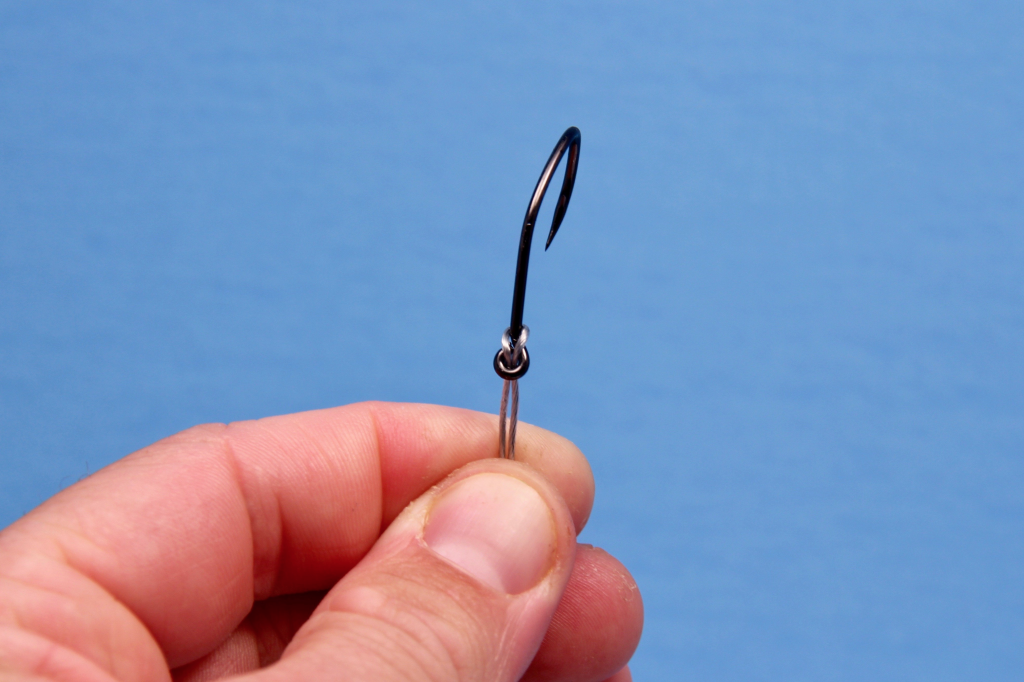
Step 4:
Carefully seat the wire loop snugly against the eye of the hook.
Step 5:
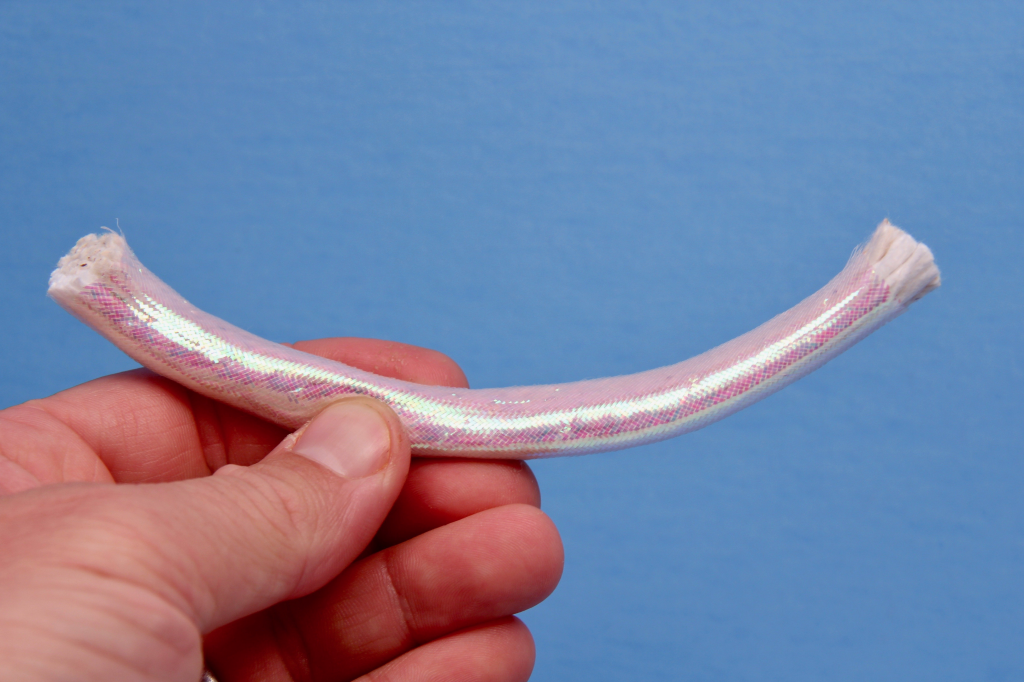
Cut a six to 7 inch pice of large mylar tubing and remove the cloth core.
Step 6:
Feed the wire end of a Loon Ergo Bobbin Threader threw the hollow mylar tubing. If you don’t have a bobbin threader, you can use a loop of wire or monofilament.
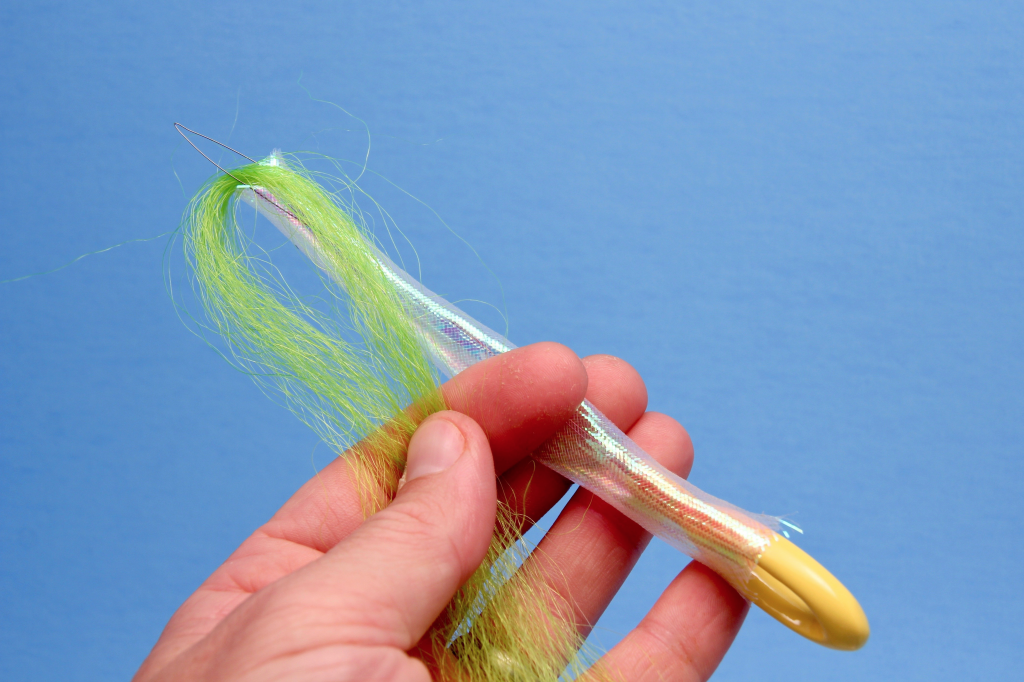
Step 7:
Pass one end of a bundle of chartreuse yak hair, approximately 100 hairs, threw the wire loop of the bobbin threader. Position the look in the middle of the bundle of hair.
Step 8:
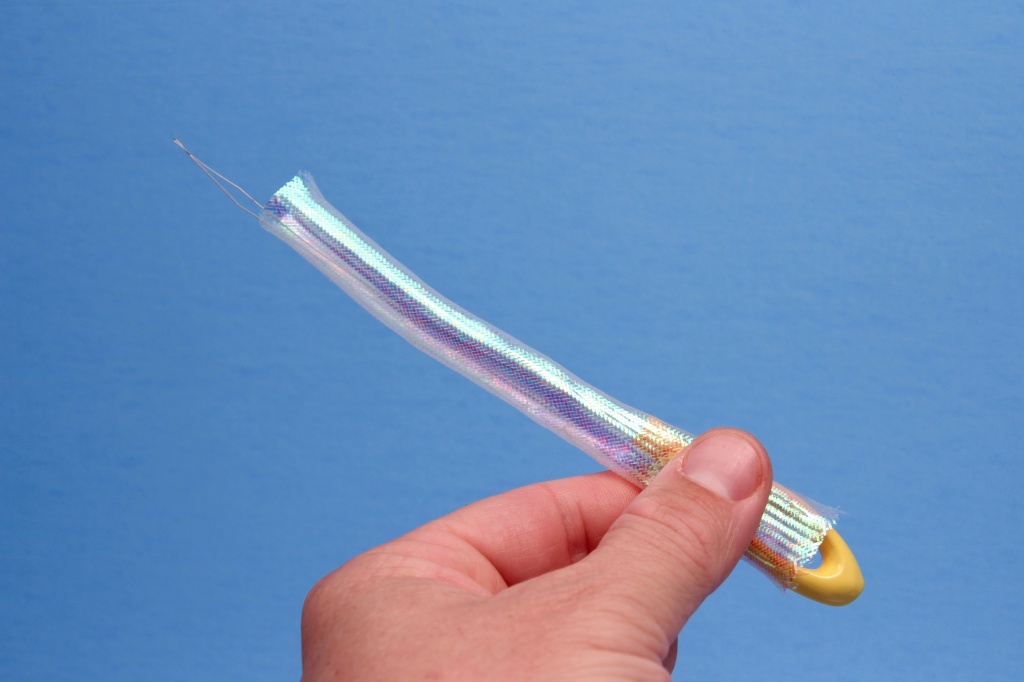
Pull the bobbin threader and the double over section of yak hair threw the hollow mylar tubing so that there is approximately 1 1/2” – 2″ of yak hair sticking out beyond the mylar tubing on each end.
Step 9:
Cut the looped end of the yak hair at it’s middle and remove the bobbin threader.
Step 10:
Feed both end of the wire threw the mylar tubing starting on the non cut end. The wire tips should be on the same side as the cut yak hair.
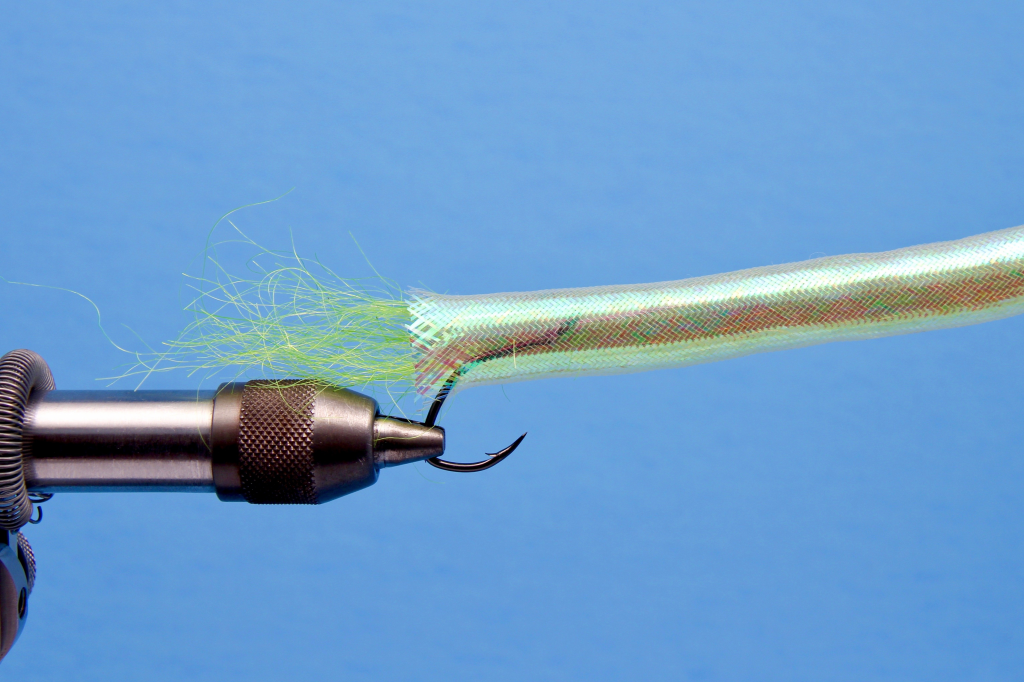
Step 11:
Put the stinger hook into the vise, hook point down, and position the mylar tubing so that it stick out beyond the bend of the hook slightly. The yak hair should extend beyond the mylar tubing approximately 1″
Step 12:
Attach the chartreuse thread directly behind the eye of the hook and overtop of the mylar tubing. Secure the yak hair and mylar in place with several tight wraps.
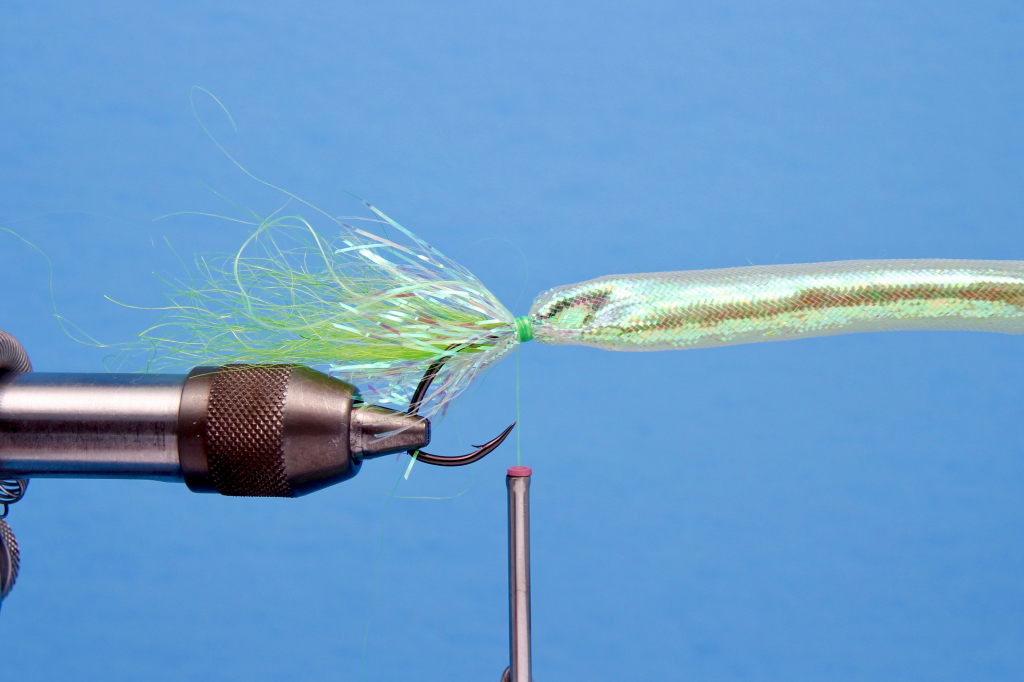
Step 13:
Once the mylar is firmly secured, lay the wires of the bobbin threader over the thread wraps and make 6-8 turns over both wires. Pull 5-6 inches off the bobbin and cut away the bobbin. Feed the tag end of the thread threw the wire bobbin threader loop.
Step 14:
Pull the tag end of thread threw the wraps and remove the bobbin threader. This will keep the thread from unwinding and can be used in place of a whip finish.
Step 15:
Trim away the excess tag end of thread and cover the thread wraps with a thin layer of Loon Outdoors Fly Finish Flow. Remove the body assembly from the vise.
Step 16:
Place the larger hook in the vise and attache the thread at the eye of the hook. Wrap backward to the bend, covering the shank with an even layer of thread.
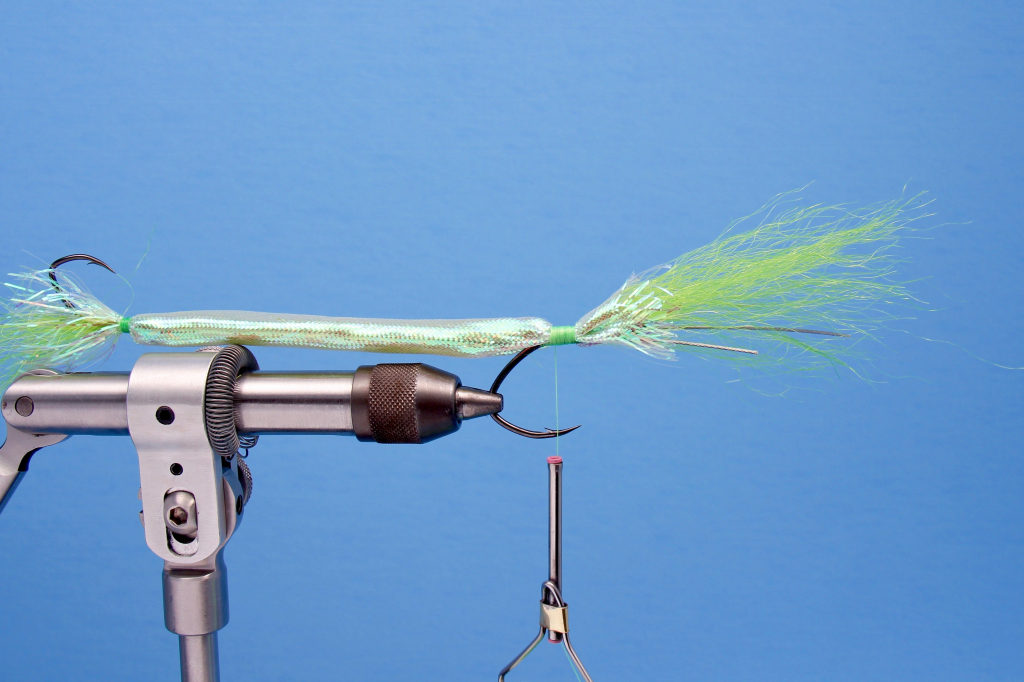
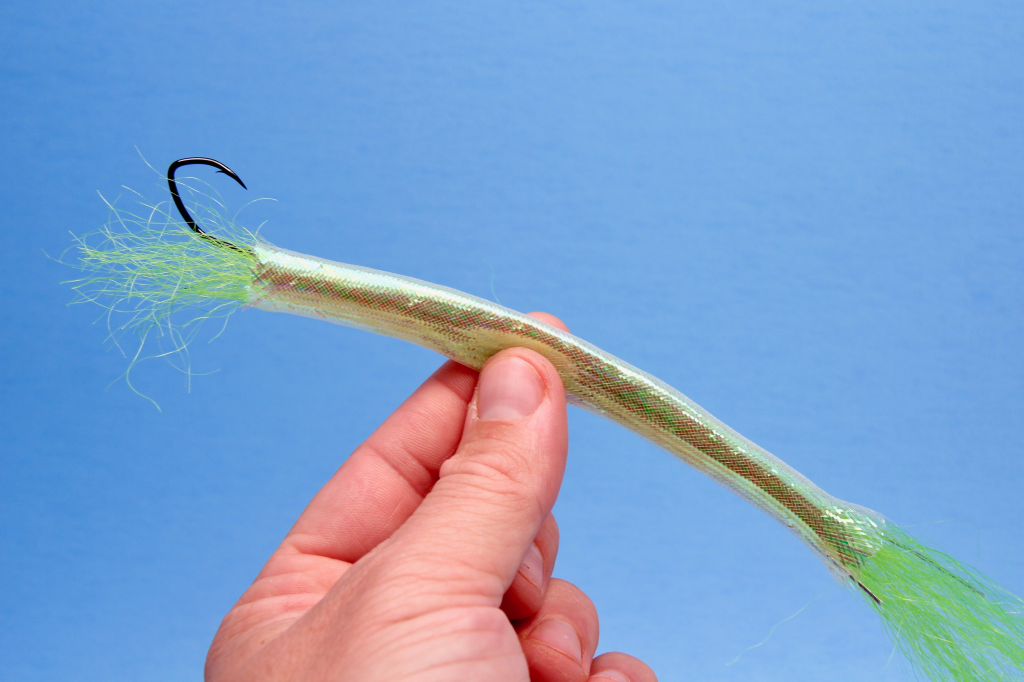
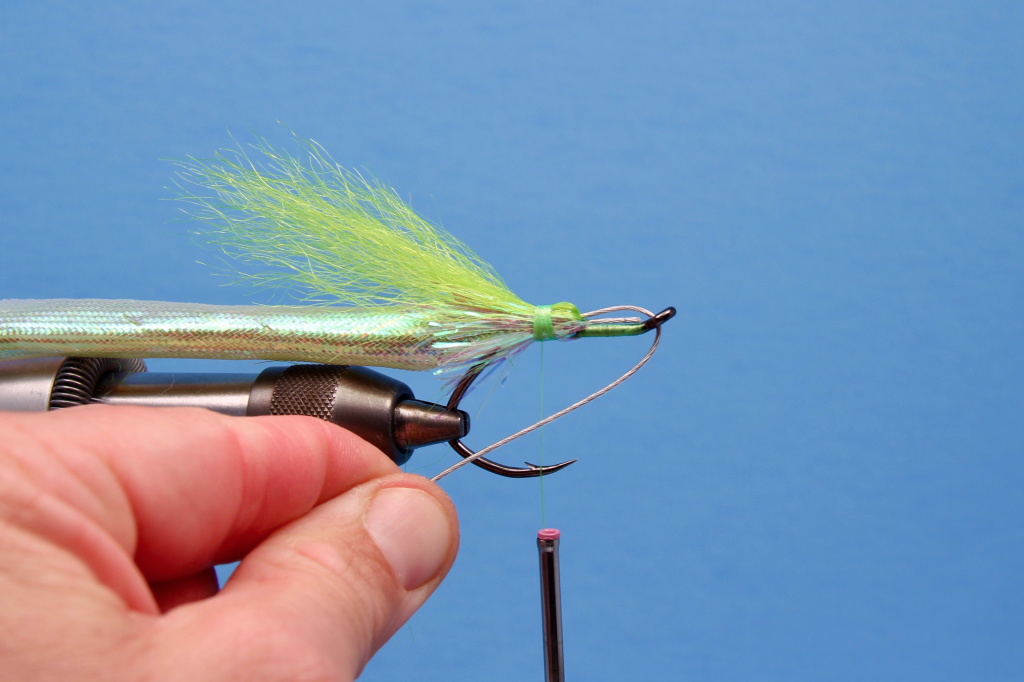
Step 17:
Position the body assembly on top of the hook. The stinger hook should be positioned in the hook point up position and the wire ends should be sticking out beyond the eye of the hook. Position the non stinger hook end of the mylar tubing so that approximately 1” sticks out beyond the bend of the hook and secure on the top of the hook shank with 20-30 tight wraps. There should be approximately 2-3” of yak hair sticking out beyond the eye of the hook.
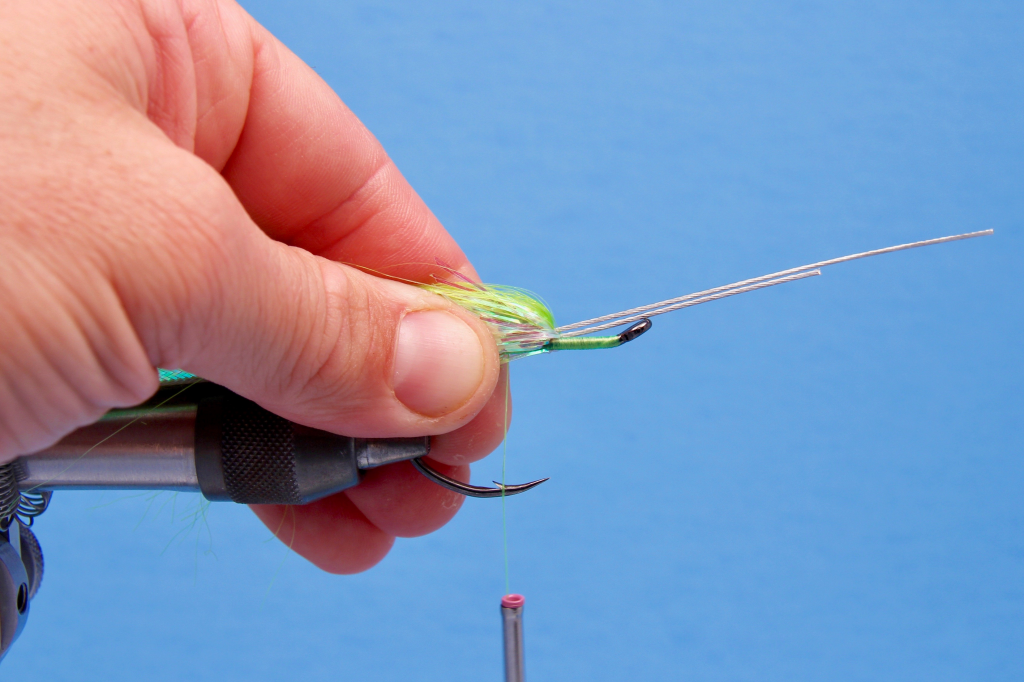
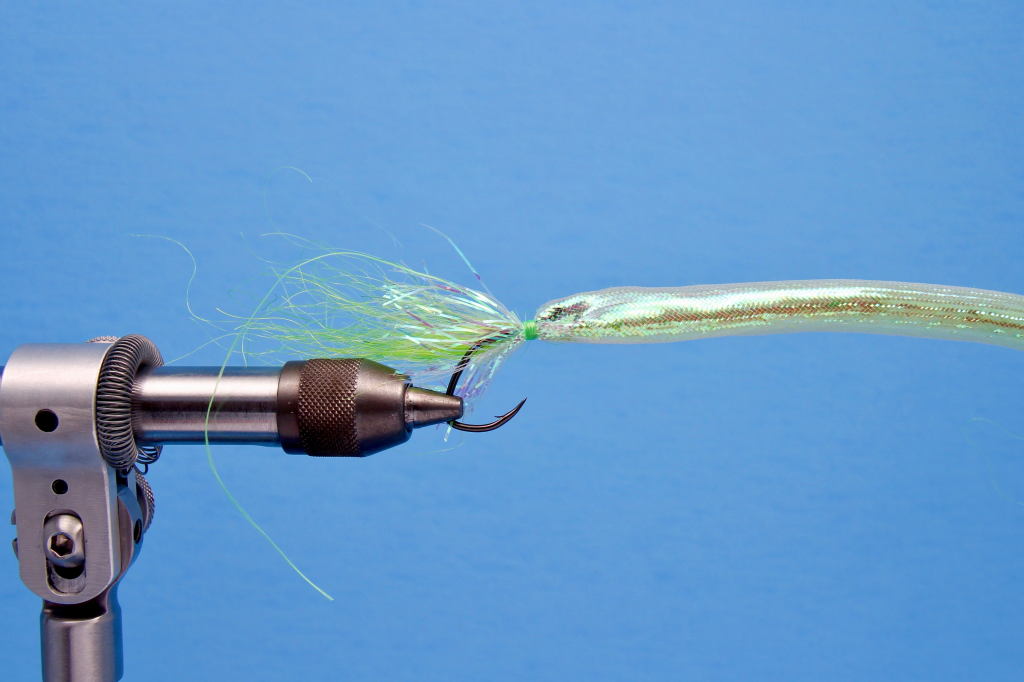
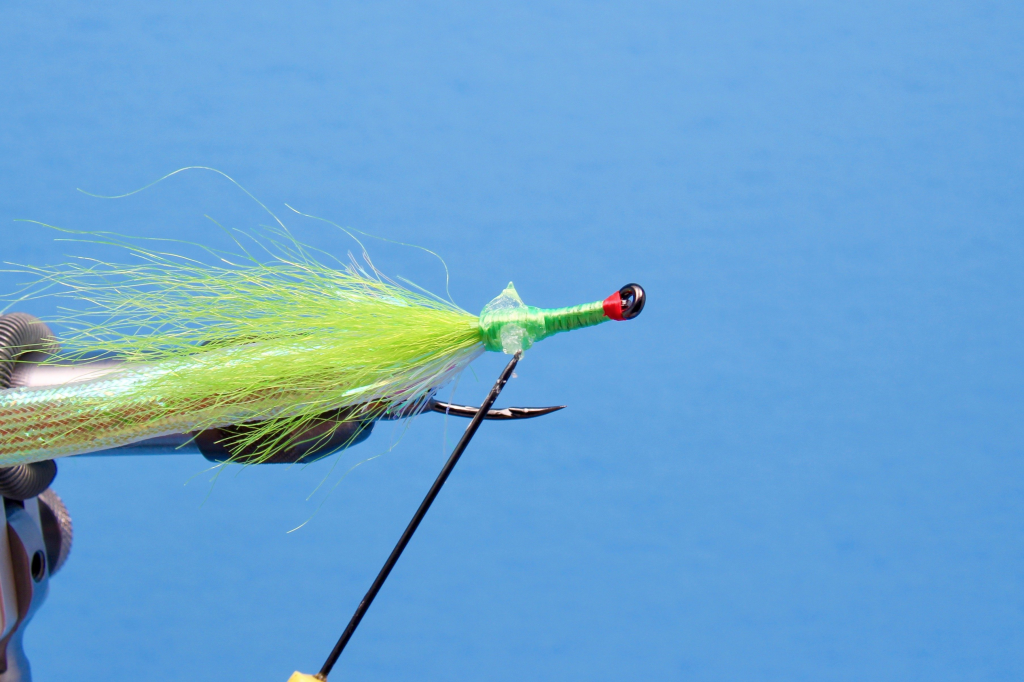
Step 18:
Being EXTREMELY CAREFUL of BOTH HOOKS, pull the tips of the yak hair and mylar tubing rearward and over top of the tied in portion. Distribute the tips of the mylar tubing and yak hair evenly on the top and sides of the mylar body. The two wire ends should be the only things stick out beyond the eye of the hook.
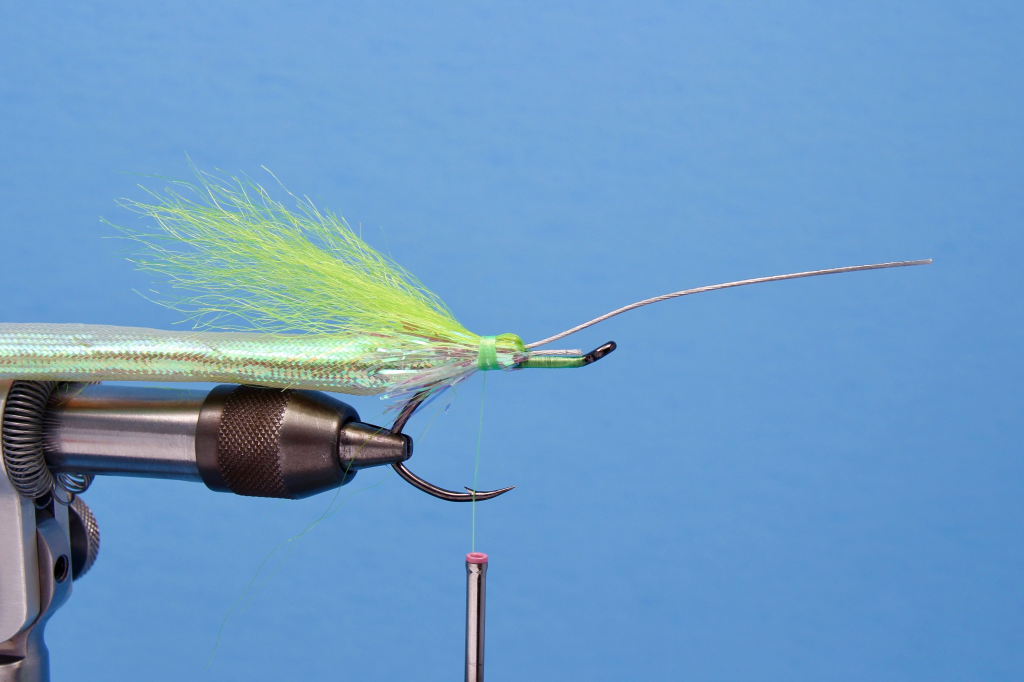
Step 19:
Secure the doubled over tips mylar and yak hair in the rearward position with several tight wraps.
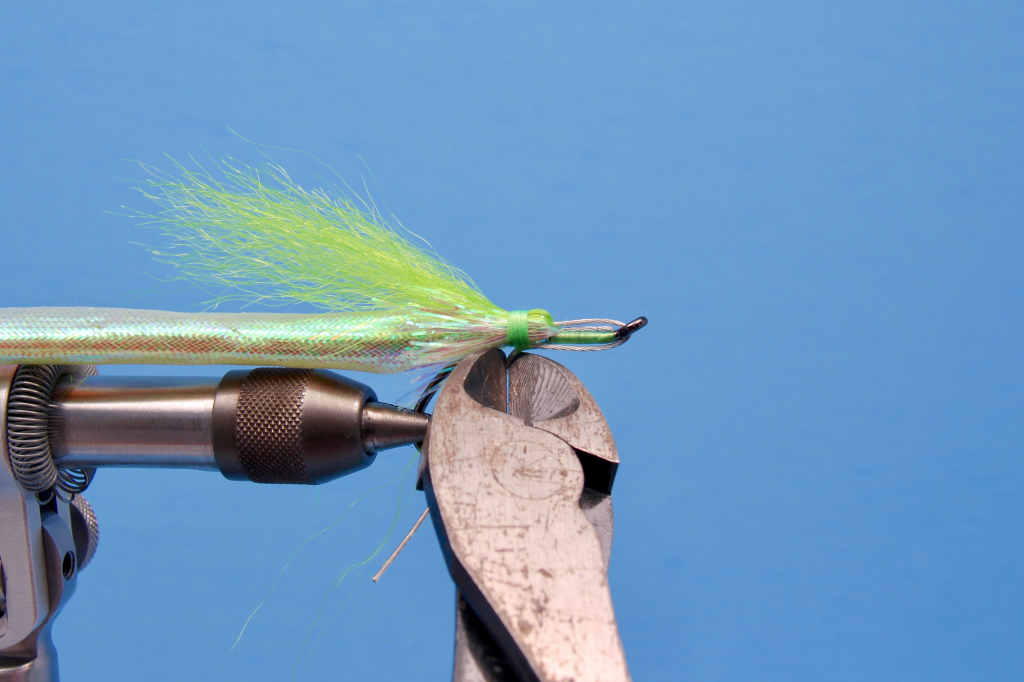
Step 20:
With a pair of wire cutters, trim the shorter of the two wires so that it is even with the eye of the hook. It should not protrude into the hook eye.
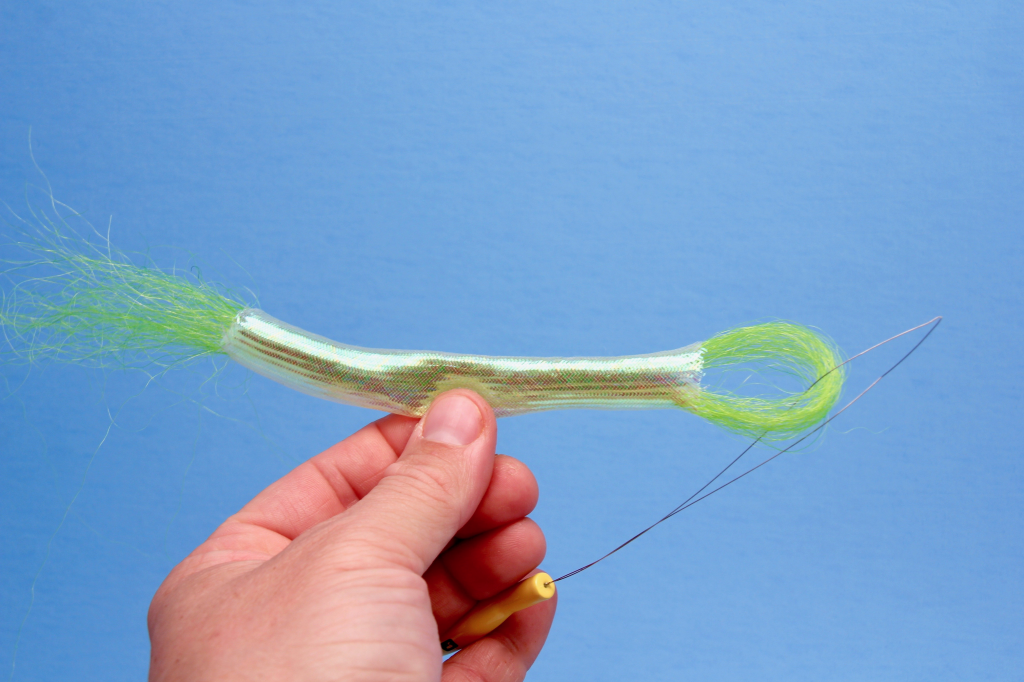
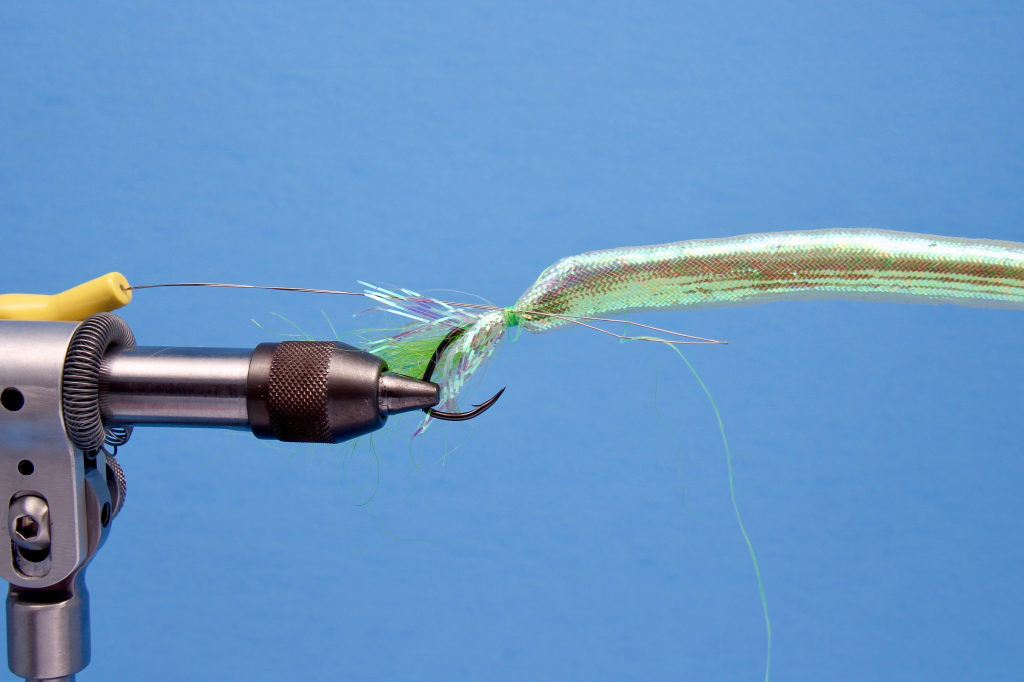
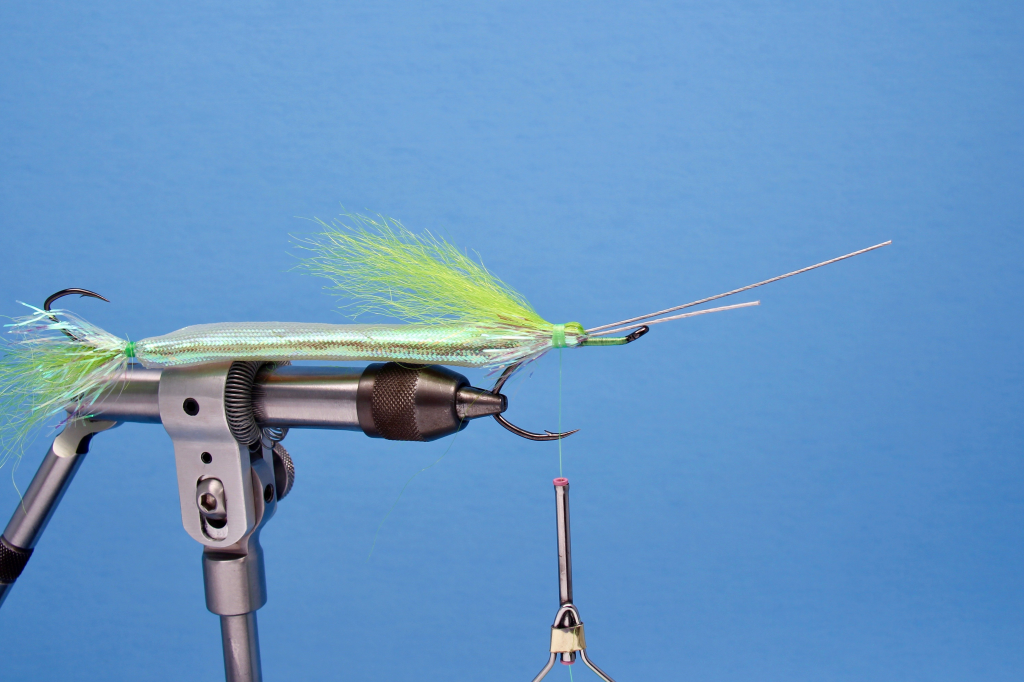
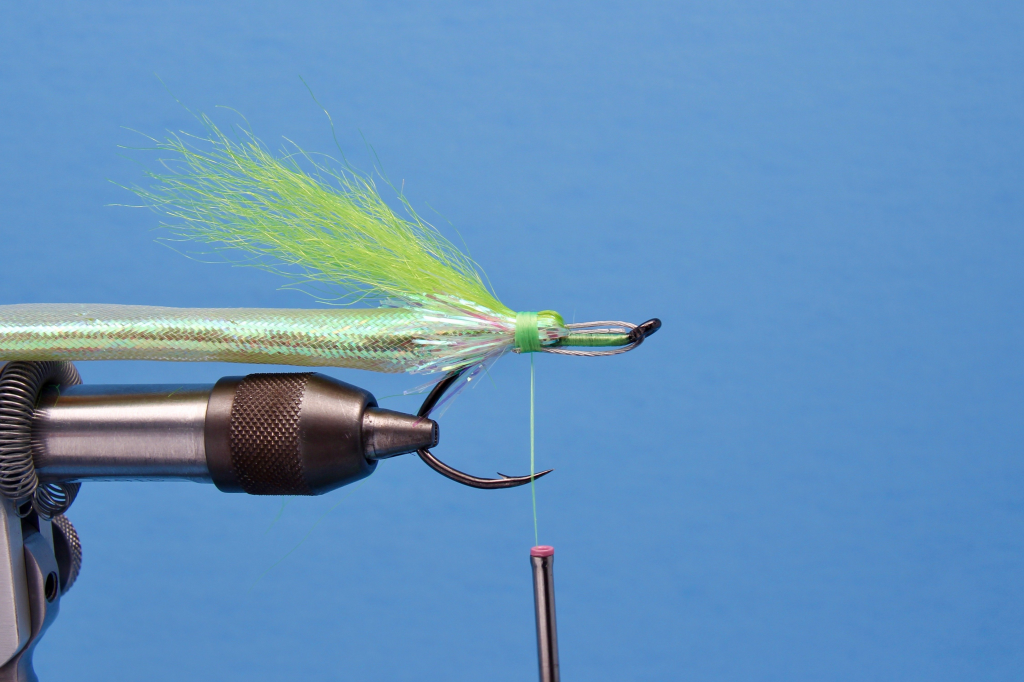
Step 21:
Feed the longer wire end threw the hook eye and carefully pull it rearward toward the bend of the hook.

Step 22:
Once the wire is taut, secure it in place with several tight wraps. The wire loop should be positioned on the top and bottom of the hook shank. If it is not taut, there will not be enough room in the eye of the hook to tie it onto the wire leader.
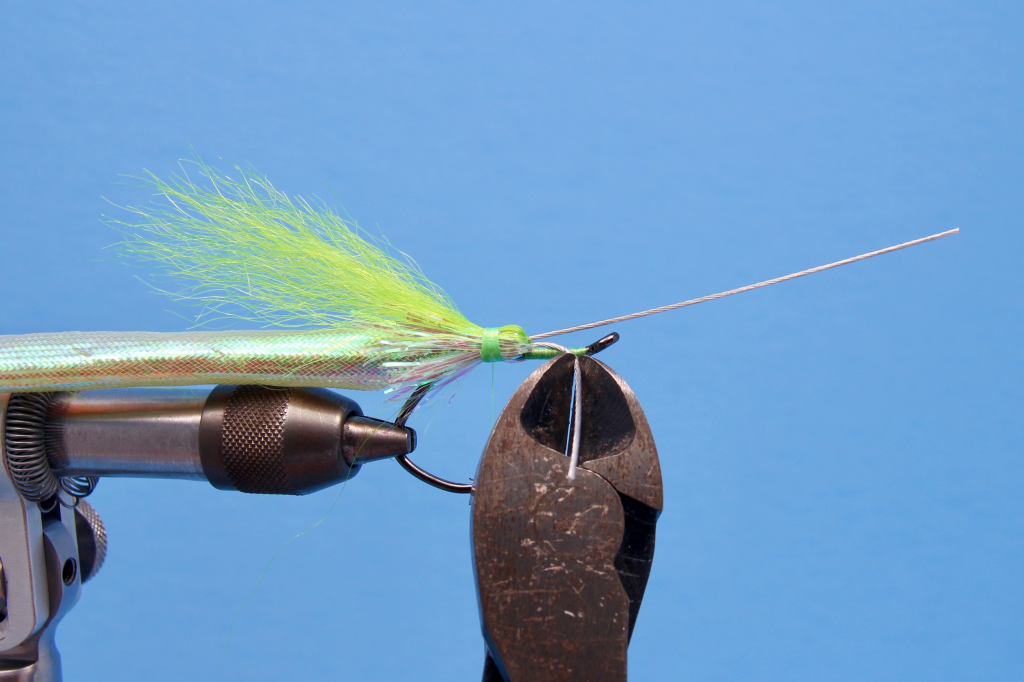
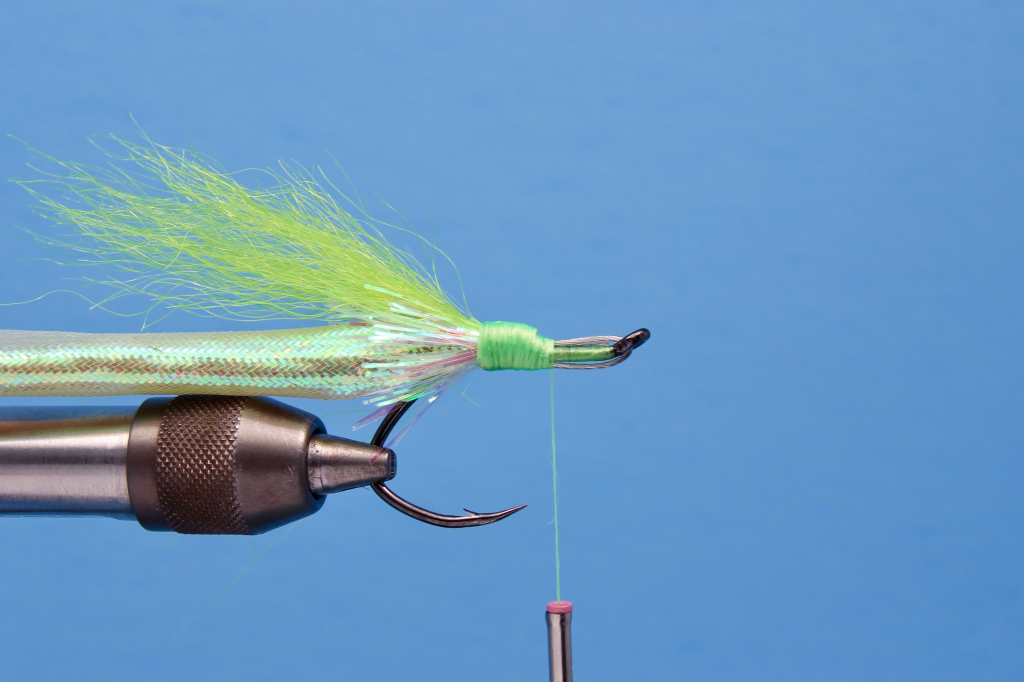
Step 23:
Using wire cutters, trim away the excess wire extending beyond the bend of the hook.
Step 24:
Flatten the thread by spinning it counterclockwise (right handed tyer or counter clockwise if you are left handed) and cover the wires with an even layer of thread. Continue working forward until you reach the eye of the hook.
Step 25:
You may need to make several passes back and forth to fill end any uneven areas and create and even thread head.
Step 26:
Once you are satisfied with the thread head, advance your thread to the eye of the hook. Whip finish and cut away the thread.
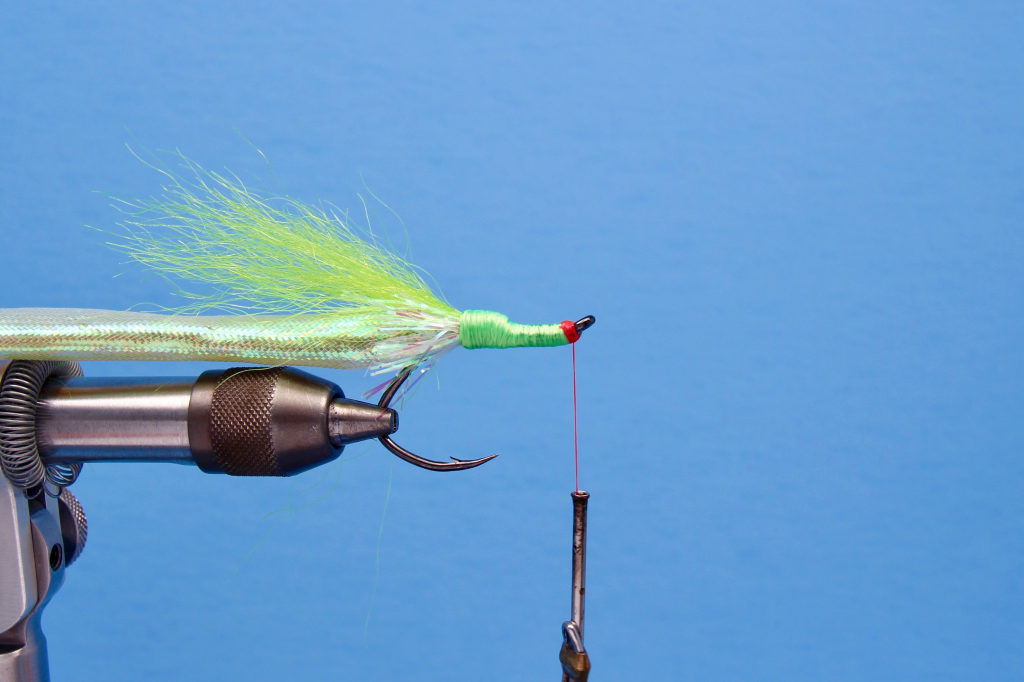
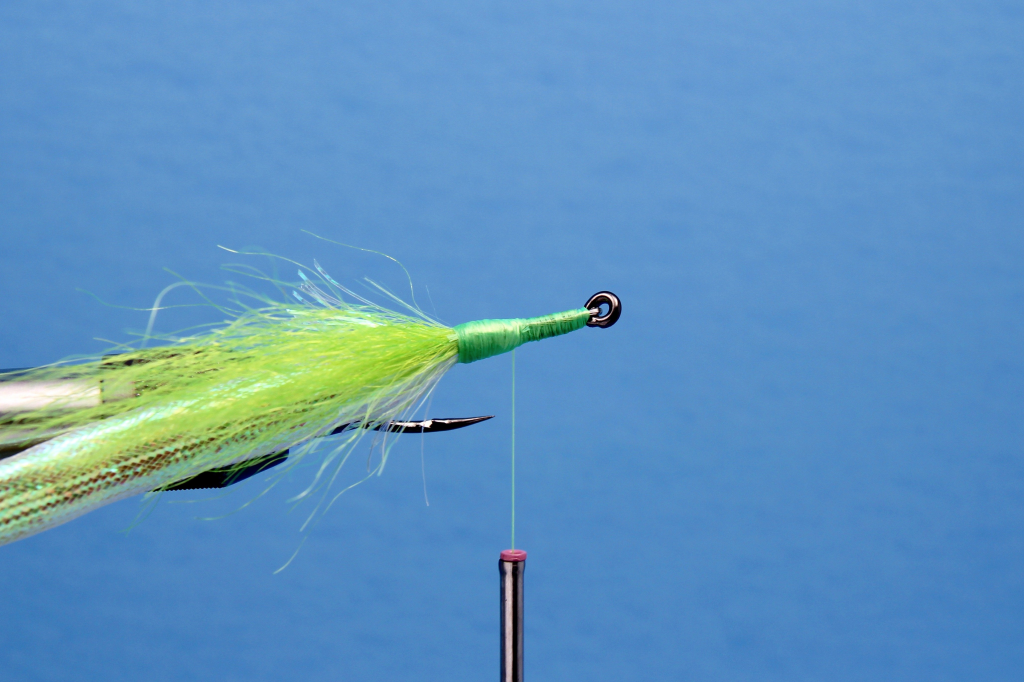
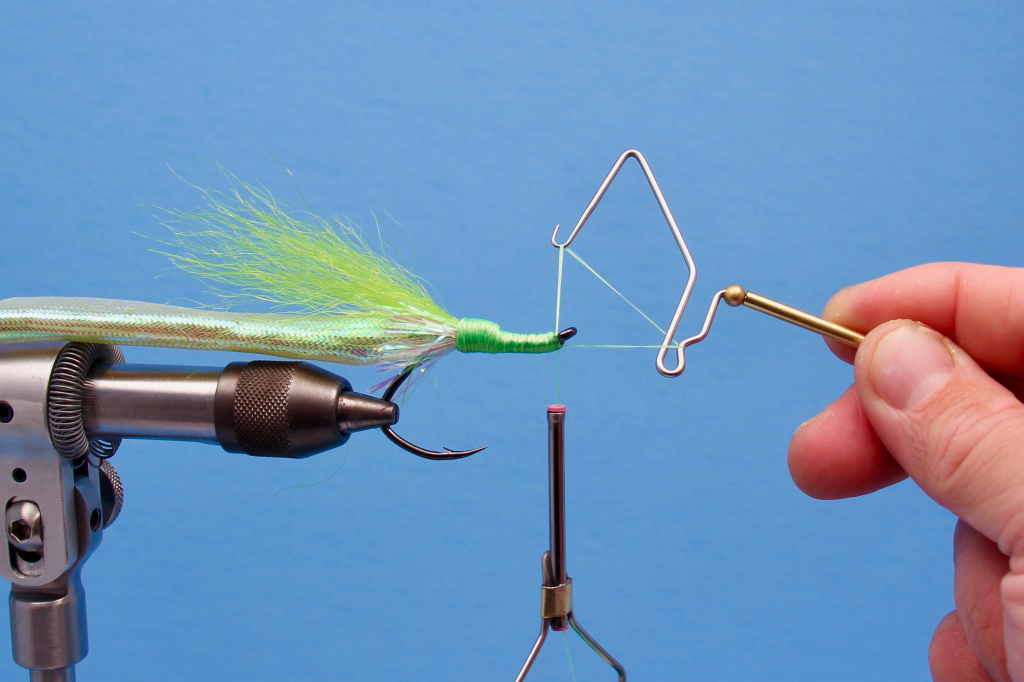
Step 27:
At the eye of the hook attach the hot orange thread. Make 5 – 6 wraps directly behind the eye of the hook. The wraps should stack directly on top of one another.
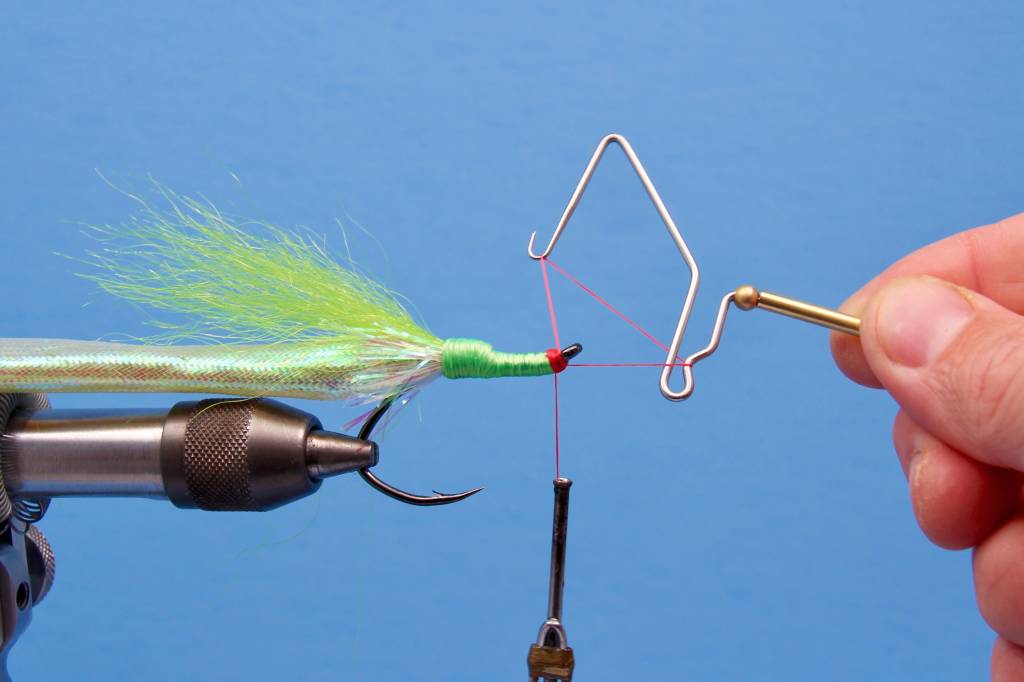
Step 28:
Whip finish on top of the hot orange thread wraps and cut away the thread
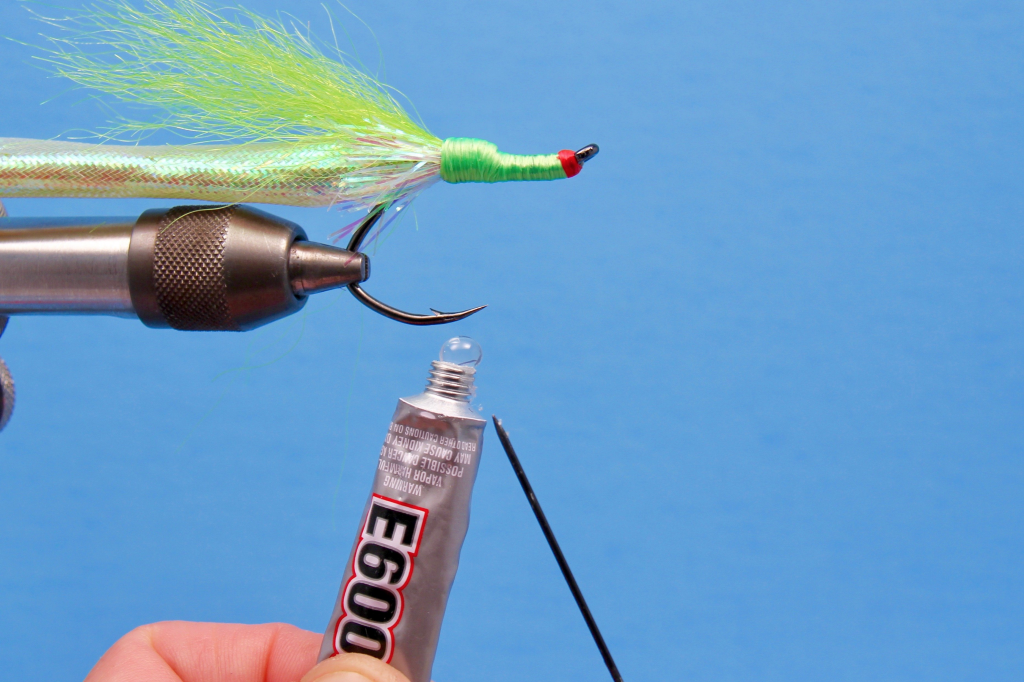
Step 29:
Using a bodkin gather a pea sized orb of E6000 glue and apply it to the thread wraps on one side of the fly directly in front of the doubled over portion of mylar and yak hair.
Step 30:
Repeat the same process on the opposite side of the hook. Be carful not to get the glue too far forward where the thread head begins to tapper down.
Step 31:
Add a 7.5 mm fluorescent yellow eye on either side of the hook and press it into the glue.

Step 32:
The placement of the eyes is extremely important to how the fly tracks in the water. Align the eyes from the top making sure that one eye is not positioned in front of the other.

Step 33:
Turn the fly toward you and double check that the eyes are aligned from a forward facing view. This is very important, because if the eyes are out of alignment it will cause the fly to spin when stripped. Set aside until the glue has dried thoroughly.
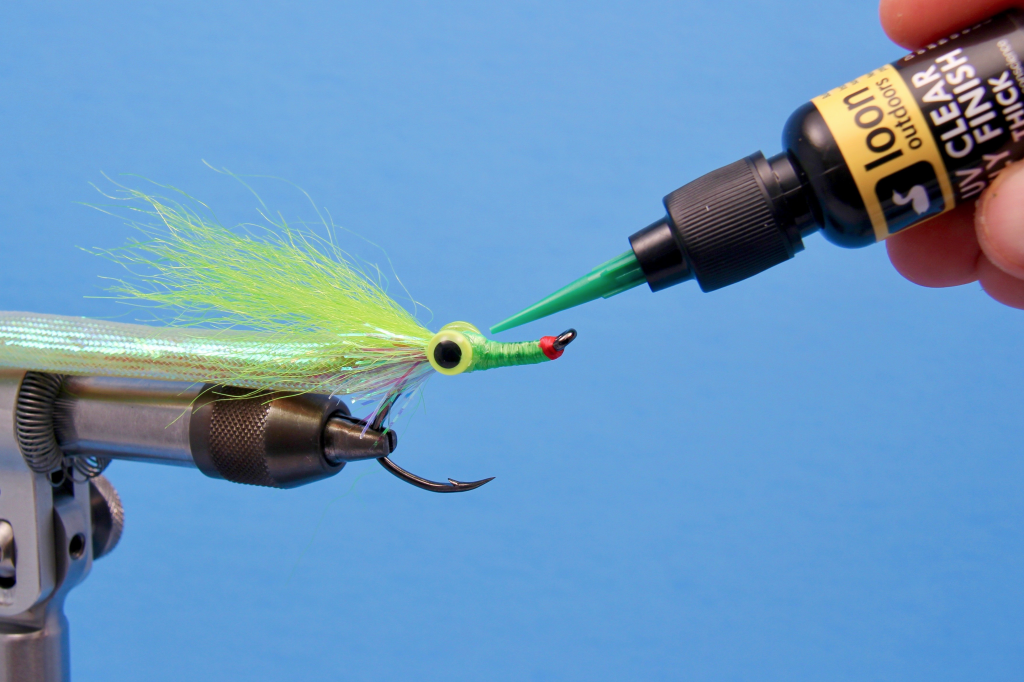
Step 34:
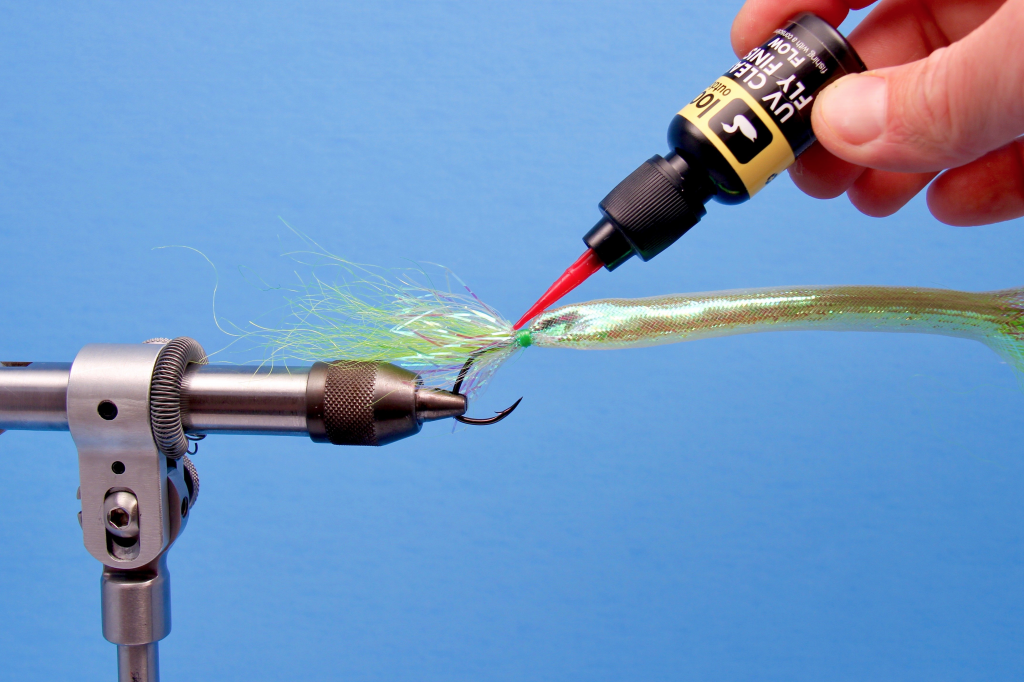
One the glue had dried, coat the entire head of the fly, including the eyes with an even layer of Loon Outdoors Fly Finish thick or 2 part epoxy.
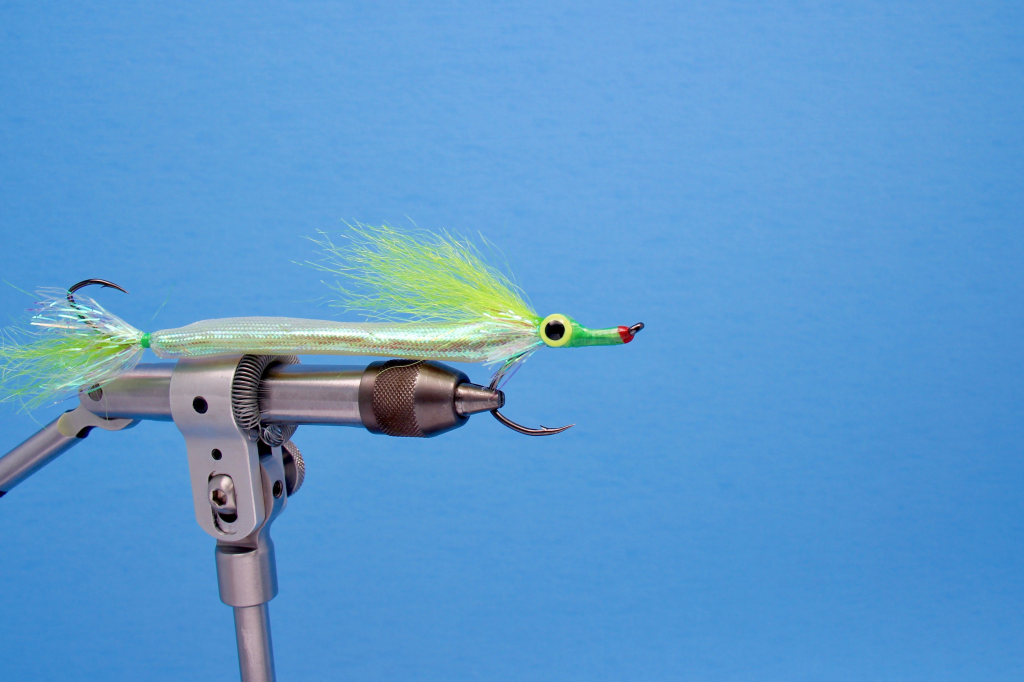
Finished Nightmare Needlefish!